


If you spend any time in automation communities or scrolling through automation content on LinkedIn, you’ve probably seen those impressive screenshots of huge Make.com (Make for short) workflows, like the one below. With dozens of connected modules filling the screen, it appears to be pure automation genius. The comments flood in: “Whoa, that’s insane!” “Automation god-level unlocked!”.

But here’s the secret: big, convoluted Make automations aren’t a flex. They’re an efficiency red flag.
When you see an overly complex workflow, you’re not looking at a well-engineered system – you’re looking at something that breaks often (and when it does, nobody knows why or where), is impossible to scale, and gives anyone tasked with maintaining it a massive headache.
If you want to build Make.com automations that are actually scalable, maintainable, and easy to manage, you need to follow a different set of rules, and we’re here to help.
In this article, you’ll learn:
- How to design automations that don’t become bloated and inefficient.
- Why breaking processes into smaller, modular workflows is better than building huge ones.
- How to set up your workflows so that, when they (inevitably) break, you don’t resort to throwing your laptop out the window out of frustration at your lack of understanding about what went wrong, and where.
- Best practices to keep your Make workflows tidy, easily readable (and hence maintainable), and future-proof
Let’s dive in.
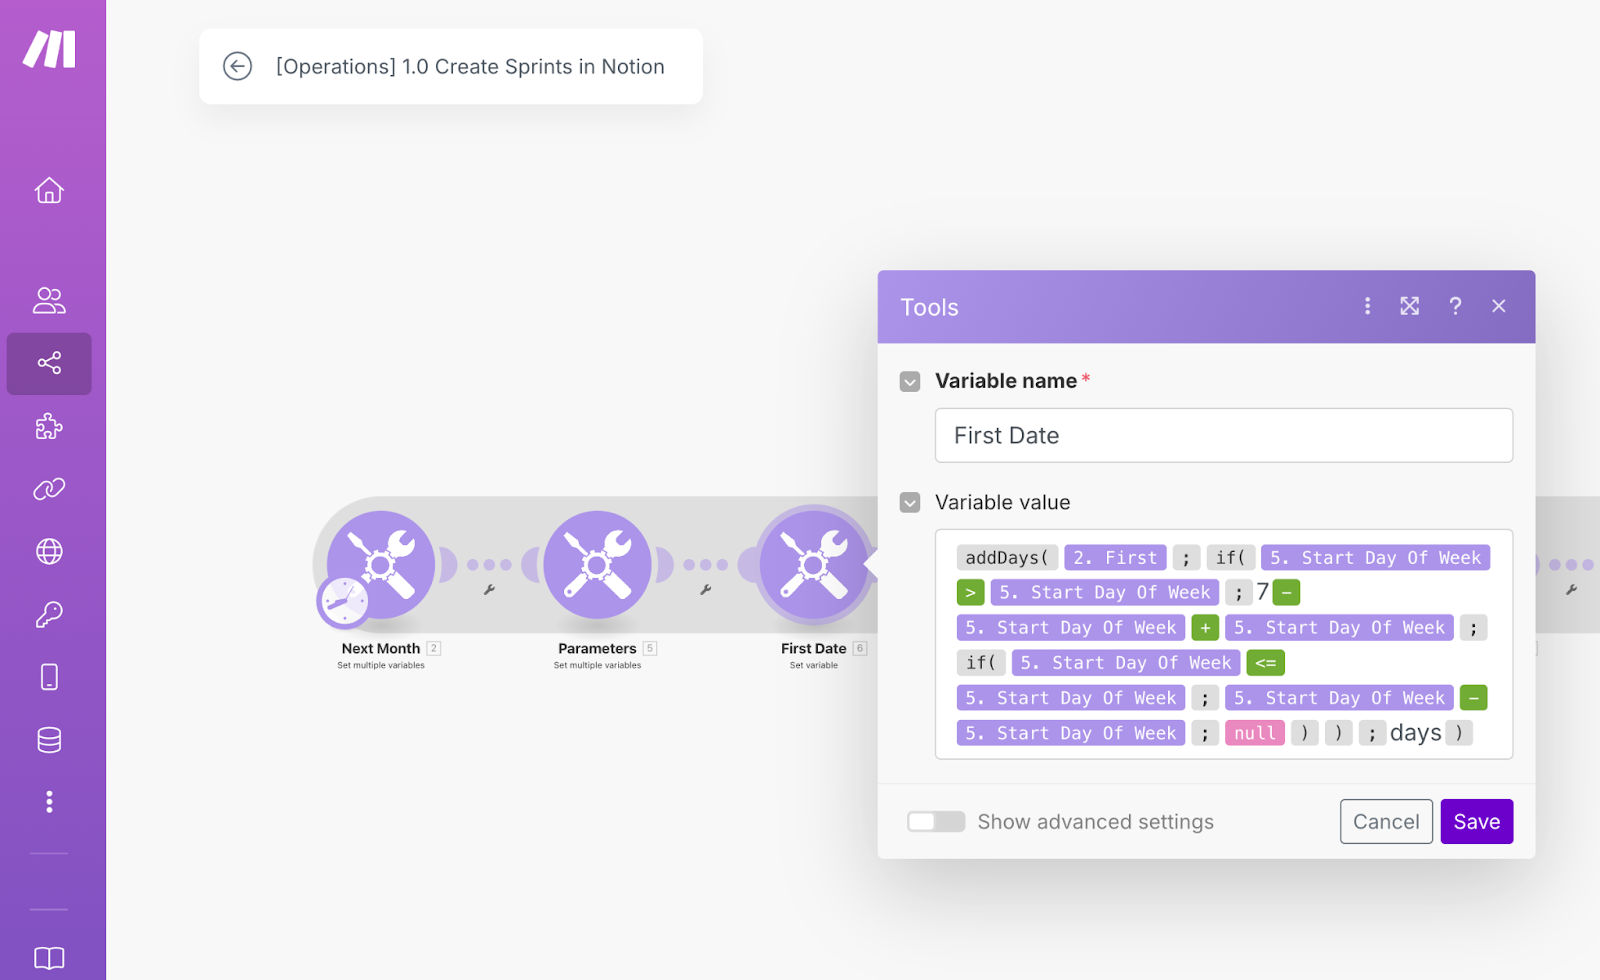
Tip 1: Use Variables to reduce repetition
Variables let you store information once and use it throughout your automation, so you’re not constantly copying and pasting the same values or setting up the same logic over and over. You can define a variable either at the start of a scenario or at any point in the workflow, as well as reference it in any module that follows. This keeps things clean, easy to update, and far less likely to break.
Variables are a core coding concept that will be familiar to any programmers, but we often see that no-coders coming to Make with less experience may not fully appreciate or understand their value. In coding, variables generally help us to apply ‘Do not repeat yourself’ (DRY) principles, that keep code efficient and streamlined.
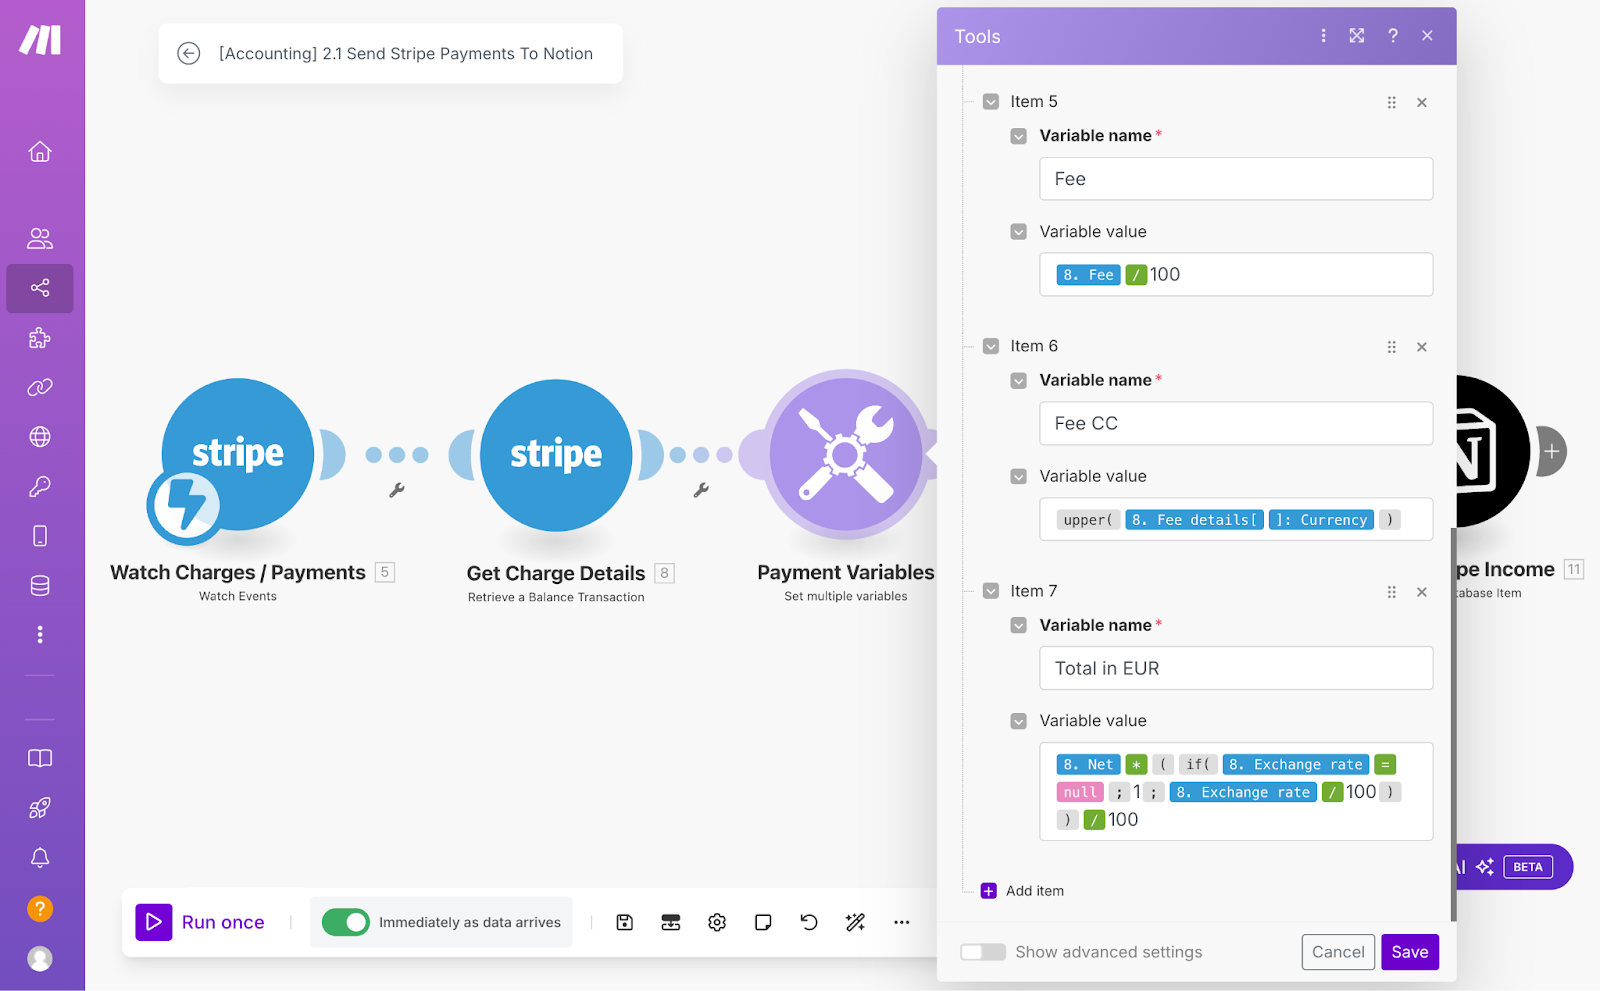
In Make, variables can hold anything: simple values like text, numbers, dates, or even entire objects - but they’re especially useful for computations, calculations, reformatting, or date manipulations.
Let’s say you need to calculate a discounted price from a sales price and a discount percentage, dynamically set due dates on monthly recurring tasks, or determine the number of days between two events.
Instead of running those calculations separately in every module that needs them, you compute the value once, store it in a variable, and reference it wherever it’s needed.

Then, when it comes to maintenance, if you ever need to change your logic, you update the variable in one single place instead of tracking down every instance across your workflow. And, if something breaks, you’re not digging through multiple modules to fix it - you update the variable once, and everything else falls in line.
Using variables keeps things modular, makes debugging easier, and helps your automation scale without turning into a maintenance nightmare. They’re also handy for merging routes, which is not a native feature in Make.
For a more concrete example of how you can use variables, you can head to our Make intermediate tutorial.
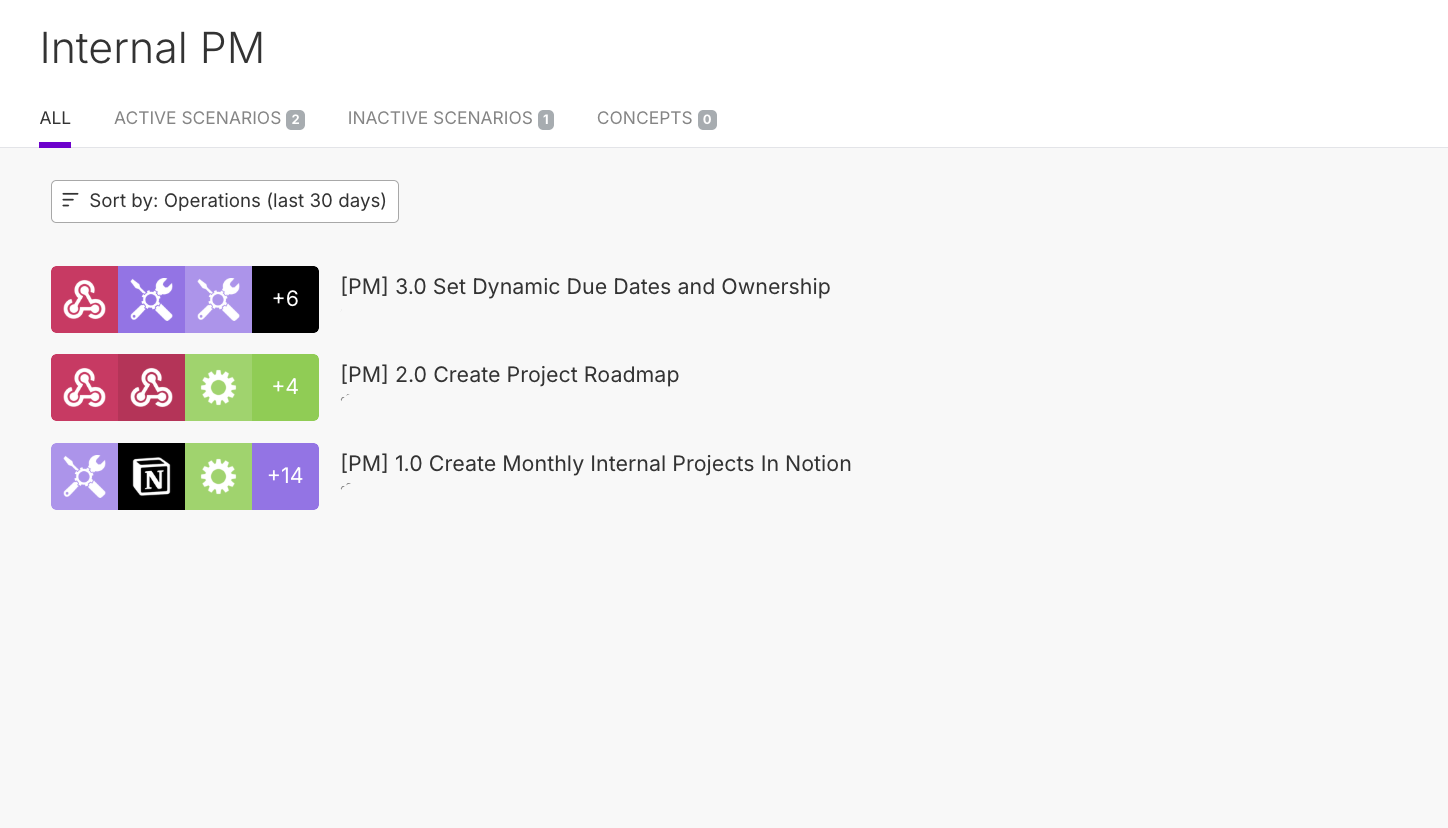
Tip 2: Break down large automations into smaller workflows
When you’re building in Make, it’s tempting to create a single massive automation that handles everything in one go.
But as your workflow grows, there are a couple of concepts to consider:
- Debugging: If something breaks, you may find yourself digging through dozens of modules to find the issue. Smaller workflows are easier to debug, as you can quickly isolate what’s wrong and fix it without tampering with the rest of your automation.
- Maintenance: as your automation grows, updates become more complex, because they usually cause greater knock-on effects down the Scenario, as other steps also need to be updated to account for the changes.
- Scale: Modular workflows can be reused as your operations grow, so it’s easier to set up new processes.
- Performance: The development studio in Make can get painfully slow when you're working with 15+ modules in one automation.
So, instead of cramming everything into one workflow, it’s better to break it down into smaller, modular workflows that handle specific parts of the process, independently.
One example might be an onboarding workflow - while it’s tempting to put the whole onboarding process into a single scenario, it’s more manageable to segment related steps into three smaller ones, such as the project roadmap, the Notion set up, and then creating the tasks themselves.
Importantly, modular workflows can be reused. You can set up one core workflow that handles the main logic and connect multiple triggers to it. For example, maybe you have an automation that creates monthly recurring projects every first of the month, but you also want your team to be able to create other common projects manually whenever needed.
Instead of duplicating logic, you structure your logic so the same workflow can be triggered both on a schedule and on demand. Like with variables, organizing your workflows in this way means that updates only need to be made in a single place, making maintenance easier.
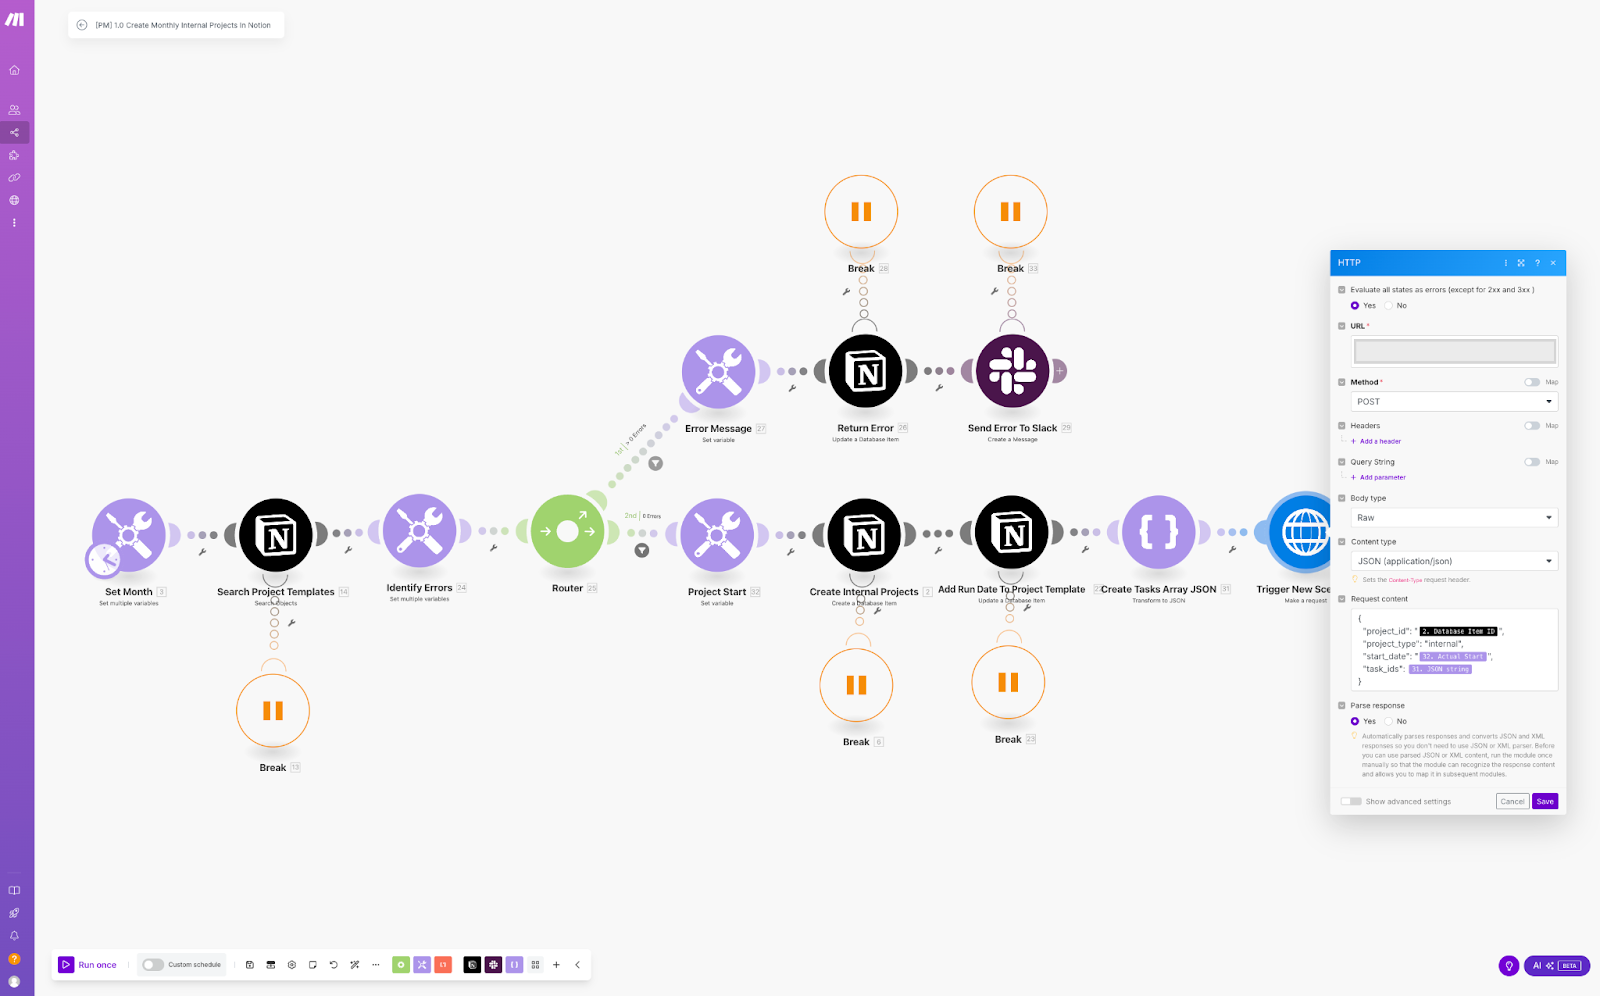
Tip 3: Set up error handlers
Errors are inevitable in automation - the sooner you accept it, the easier your life will become. APIs go down, unexpected data formats cause failures, and sometimes things just break. But if you have good error handling in place, you can ensure that a large portion of non-critical errors resolve themselves. Yep, you heard that right.
Instead of manually fixing every issue, error handlers in Make help you catch, manage, and respond to errors, instead of letting them derail your entire automation. They give you the power to decide what happens when something goes wrong - whether that means retrying, skipping, or logging the issue for review.

Here’s a quick breakdown of Make’s main error handler options and when to use them. We sorted them by relevance and how useful they actually are in real-world automation.
Break
This is the most commonly used error handler. It stops the execution of the scenario and marks it as incomplete, allowing you to fix the issue and reprocess it later without losing data, either manually or automatically.
Best for: Automatic API timeout or other temporary API error handling and critical workflows where an error needs to be reviewed and manually corrected before continuing.
Example: You have an automation that syncs new orders from Shopify to your order management system. If the API times out or you hit API limits, the Break error handler can pause the run, allowing it to be retried automatically later - without losing any data.
Resume
This is the most common error handler for errors which are not mission-critical. It replaces the failed module’s output with a fallback value and continues running the scenario, marking the run as successful.
Best for: When missing or incorrect data isn’t mission-critical, and so a fallback value will do just fine.
Example: You have an automation that sends a confirmation email when an order is shipped. If the API request doesn’t return the customer’s first name - something you planned to use in the email greeting - you don’t want the whole automation to fail. Instead, you use Resume to insert a fallback value (e.g., “Hi there” instead of “Hi [First Name]”) and let the email send as usual. The email still goes out, just without the missing personalized detail.
Ignore
Not used commonly, but can prove helpful in niche use cases. Ignore skips the error, continues the automation as if nothing happened, and marks the run as successful - even when errors occur.
Best for: Non-critical steps where a failure won’t affect the overall workflow or final result.
Example: You have an automation that logs leads who book a meeting through your Calendly link in Airtable. If a lead doesn’t provide a non-essential detail (like "Phone Number"), you don’t want the whole workflow to fail. Instead, you ignore the error and log the rest of the data, so everything else still gets saved.
Rollback
This error handler is used rarely. It stops the scenario and reverts changes made by database modules that support transactions (e.g., MySQL, Make’s Data Store) - you can spot these modules by the ACID tag.
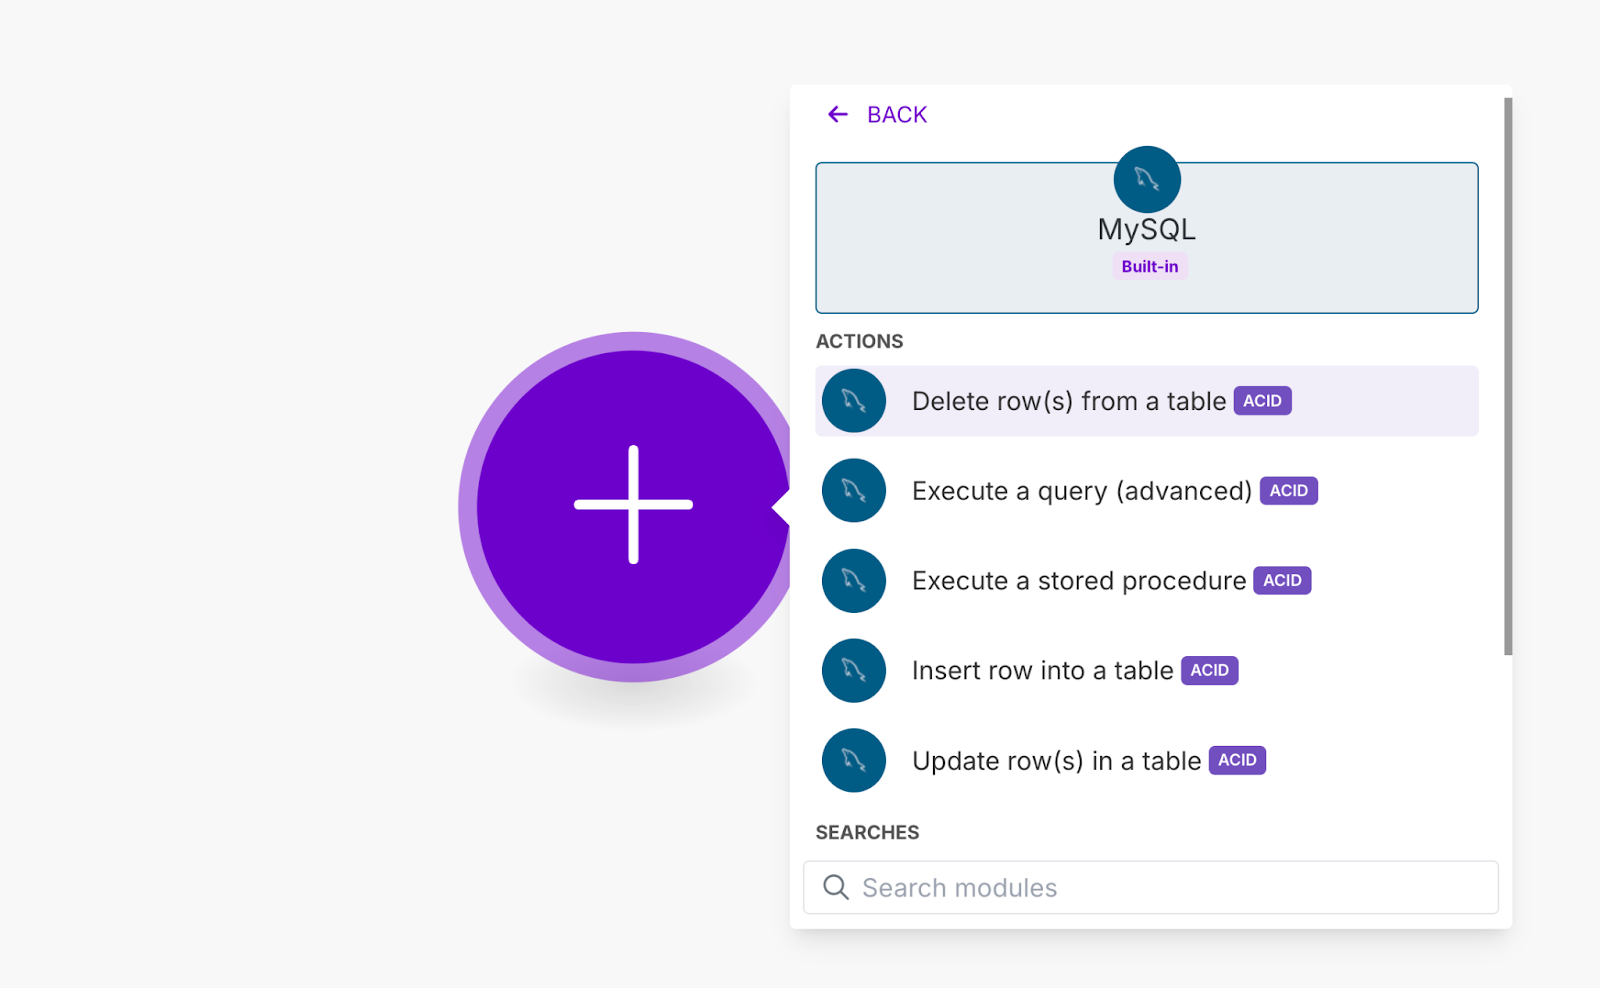
Best for: Database workflows where partial updates could leave broken or inconsistent data.
Example: You have an automation that creates a shipment record in MySQL and assigns a tracking number from a third-party shipping provider. If the shipment record gets created but the tracking number generation fails, you don’t want a shipment sitting in your database with no way to track it. That would mean you’ve got a package that doesn’t actually exist in the shipping system, which is a logistical nightmare. Rollback makes sure that either both actions go through, or nothing gets saved, so you don’t end up with ghost shipments that mess up your operations.
Commit
This one’s not very useful in practice. The Commit error handler stops execution at the point where the error happens and marks the run as successful. Use carefully - Commit makes it impossible to catch errors in executions, so only use it when you’re okay with ignoring failures completely.
Unlike Ignore, which skips a failed module and allows the scenario to continue, Commit stops the run entirely at the point of failure but still marks it as successful. This means anything before the failure is saved, but nothing after the failed module runs.
Best for: Scenarios where partial execution is acceptable, and there’s no need to retry or review failed steps. Commit is useful when previous actions in a scenario should be saved, even if later steps fail.
Example: This use case is so rare and niche that we don't even have an example for you!
Using error handlers keeps your workflows running smoothly, prevents unnecessary failures, and ensures you’re in control of what happens when something breaks. The key is knowing what error handlers to use for different types of use cases, when to let errors slide and when to take action.
Tip 4: Use consistent naming conventions
Untidy automations are a nightmare to debug or upgrade, especially when you come back to them weeks or months later. Using clear and consistent naming conventions for modules, scenarios, and key variables makes your workflows easier to understand, maintain, and scale.

Here are a few tips you should consider:
- Name your modules and variables descriptively: Instead of leaving generic names like “Search records” or “Update data”, be specific: “Find unpaid invoices in Airtable” or “Update order status to ‘Shipped’”.
- Use structured naming for scenarios: Keep scenario names clear and action-based, like “Sync new Shopify orders to Airtable” instead of “Shopify-Airtable”.
- Use numbering for subsequent scenarios: If your automation is split across multiple scenarios, use a numbering system to keep them in order, e.g., “1. Fetch new orders”, “2. Process order data”, “3. Send order confirmation”. This makes it clear how workflows connect and helps avoid confusion.
- Leave notes for extra context: Add comments inside complex workflows to explain why certain steps exist, especially for filters, conditions, and error handlers.
- Align on naming conventions within your team: This part is crucial to ensure consistency across all automations within your team and makes it easier for everyone to understand, troubleshoot, and scale workflows without confusion. Standardizing how you name scenarios, modules, variables, and folders keeps everything organized and prevents wasted time deciphering someone else’s logic.
- Use folders: Folders keep your automations organized and easy to find. Group related workflows together, separate live scenarios from test ones, and avoid dumping everything into a chaotic list. A little structure now saves a lot of headaches later.
A well-structured automation isn’t just easier for you to manage - it also makes things simpler for anyone else who needs to work on it later.
Tip 5: Plan around API limits
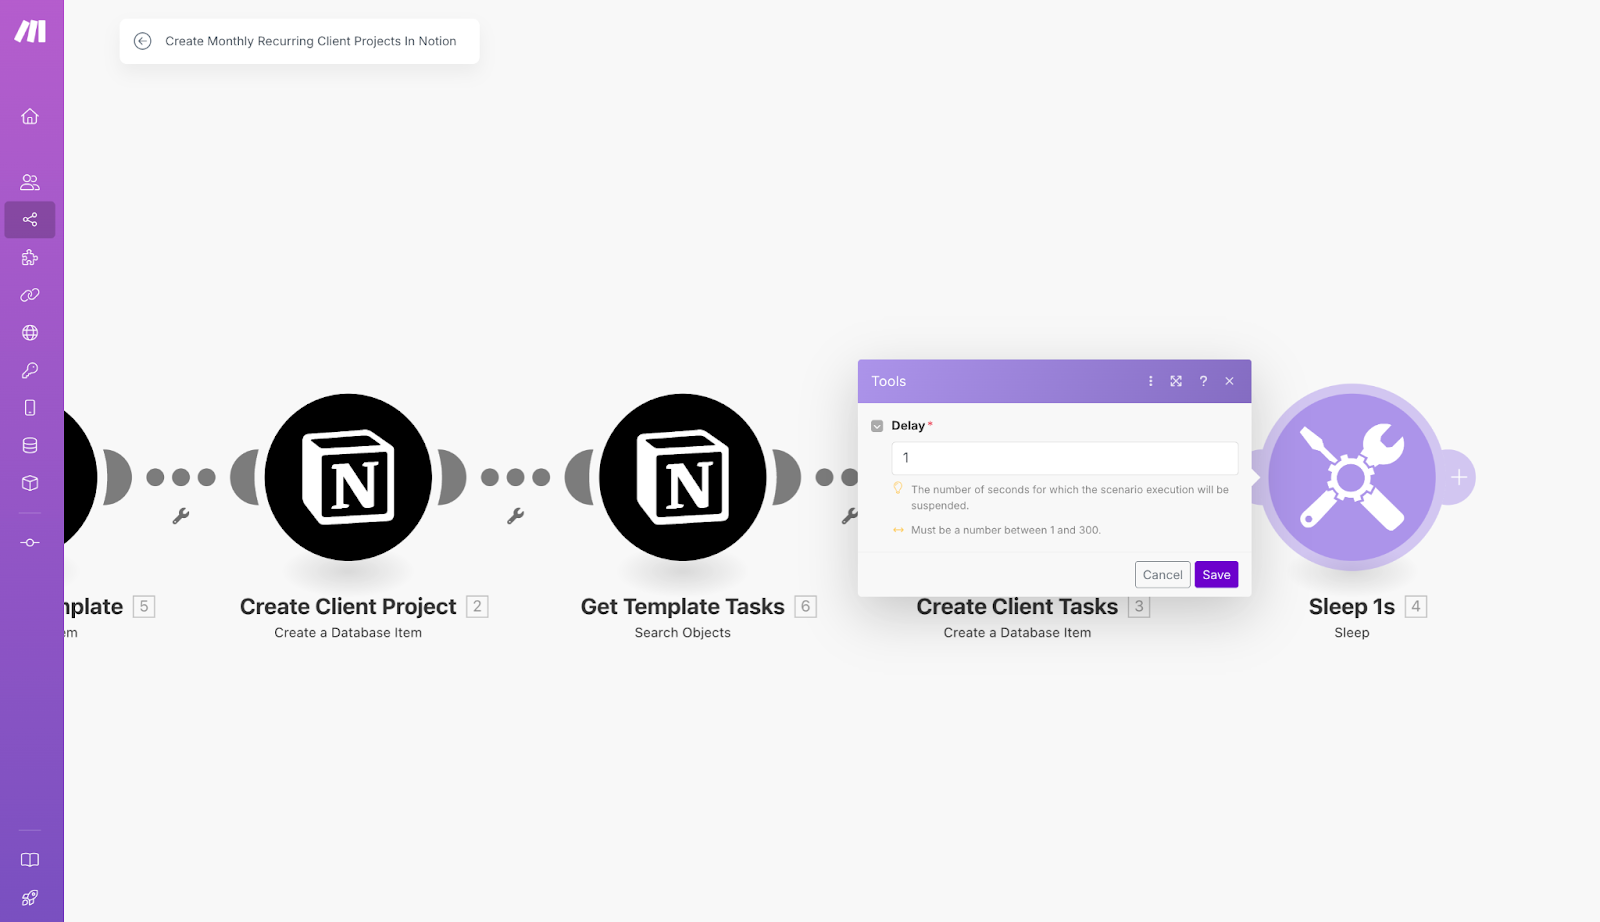
Many APIs have rate limits that cap how many requests you can send within a certain timeframe. If you hit those limits, your automation might start failing, leading to unnecessary errors and delays. Instead of overwhelming an API and dealing with failed executions, plan ahead by using sleep modules, scheduling, and by processing data in batches to keep everything running smoothly.
Here are some ways to stay within API limits:
- Use Sleep modules to space out API calls: Adding short delays between requests prevents hitting rate limits, especially when working with a lot of volume. This is key for APIs with strict per-minute limits.
- Process data in batches instead of all at once: Instead of pushing hundreds of requests in a single run, limit how many records your automation processes at a time. In any case, depending on your Make plan, scenarios have strict rules on how long a single run can last. Splitting the load into multiple runs can help avoid hitting those limits.
- Be intentional with your automation retries (Break error handler): If an API rejects requests due to rate limits, hammering it with constant retries will only make things worse. This is where the Sleep modules we mentioned above come in handy - adding a delay between retries gives the API time to recover and reduces the chances of repeated failures.
A little planning goes a long way. If your automation works with APIs that have strict limits, spacing out requests and processing data in smaller chunks can be the difference between a smooth run and one which is frequently interrupted by failures.
Conclusion
Building great automations in Make isn’t about cramming everything into one giant workflow and getting LinkedIn kudos from people who have no clue how to build scalable automation. It’s about designing systems that actually work efficiently.
By using variables to reduce repetition, breaking down large automations, setting up error handlers, keeping naming conventions clean, and planning around API limits, you make your workflows easier to debug, easier to scale, and way less painful to maintain.
Most people throw automations together without a plan - that’s why so many turn into a tangled mess. But when you build with intention, you create automations that don’t just run today - they keep running without breaking, without drama, and without wasting your time later.
Stay tuned for more no-nonsense, real-world advice that so-called automation gurus won’t tell you - but will actually level up your automation skills.

