


Monitoring website uptime is crucial for businesses. Downtime can result in lost revenue and poor user experience. This tutorial demonstrates how to:
- Use Zapier to monitor website availability.
- Send alerts to your team via email or Slack.
This tutorial is a great way to get to grips with the basics of the Zapier platform. From start to finish, this should take less than 20 minutes to set up.
With website failures, time is of the essence - so let's jump straight in!
Step 1: Set up an account with Zapier
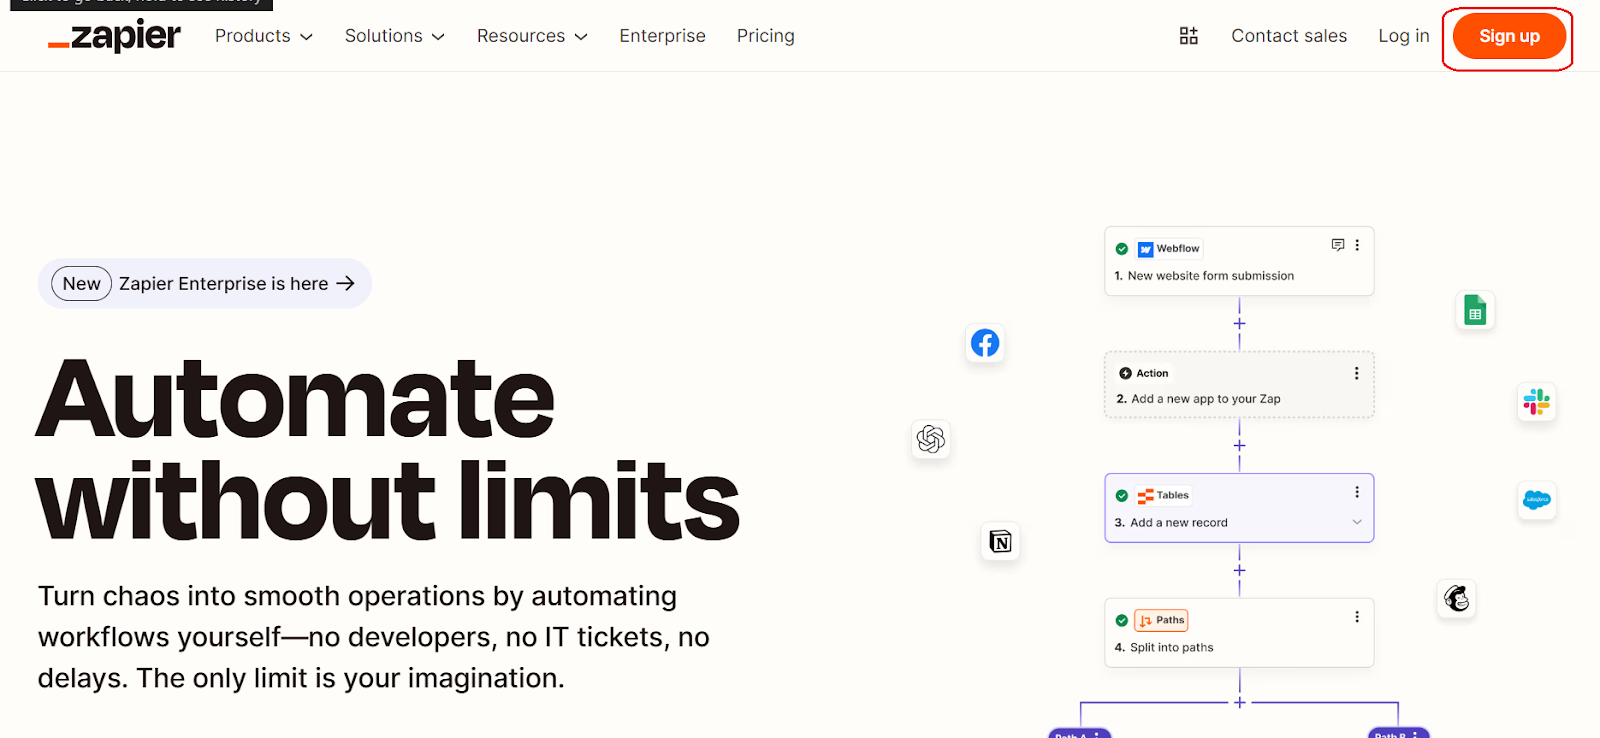
First things first, head over to Zapier. If you’re not already a user, sign up by clicking the sign-up button in the top right corner—it’s free to get started!
Pro Tip: Zapier offers a 14-day free trial for premium features. Even after the trial ends, you can still use core features for free, which is enough for keeping up your Website Alerts System.
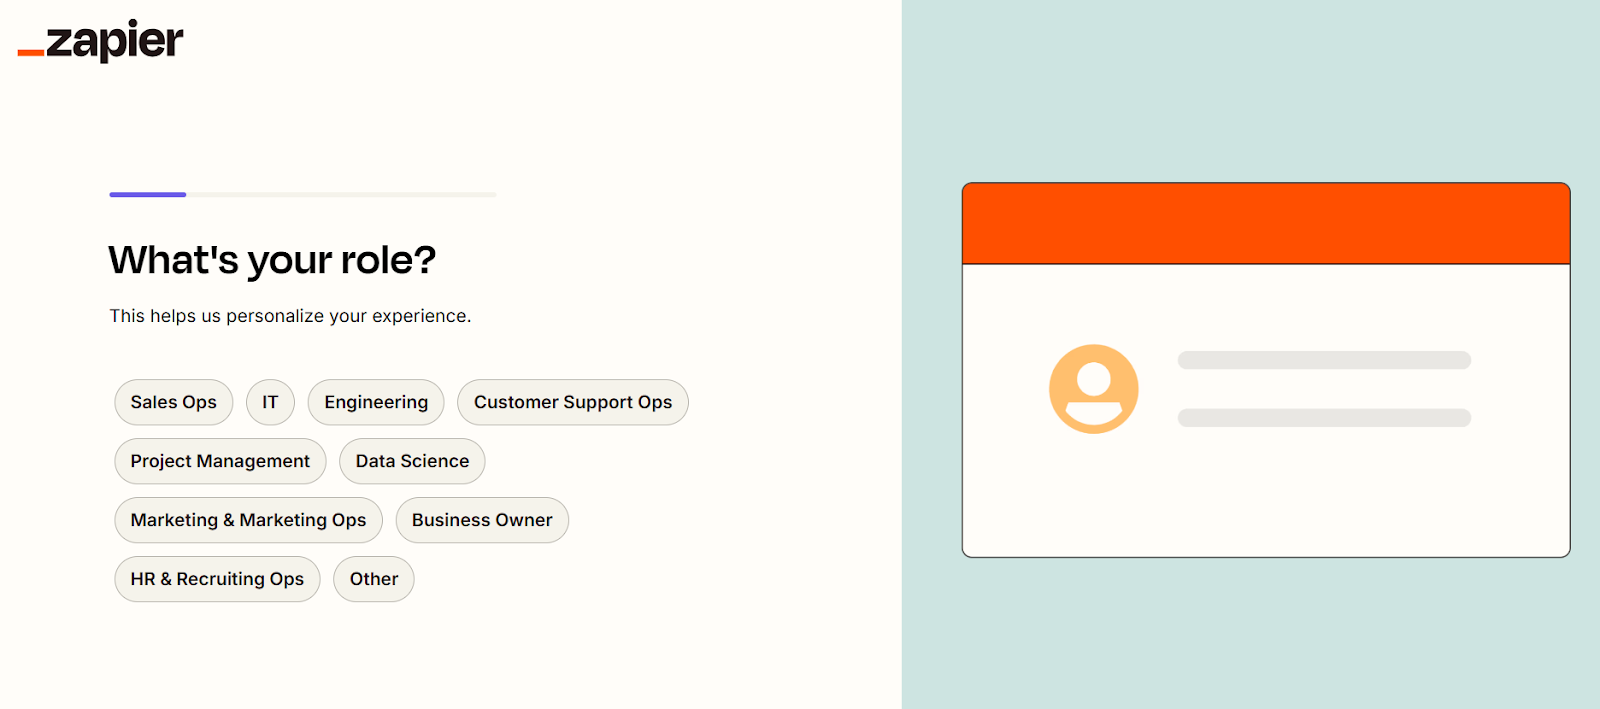
After signing up, Zapier will guide you through a quick setup to tailor the experience to your needs. You can skip right through this.
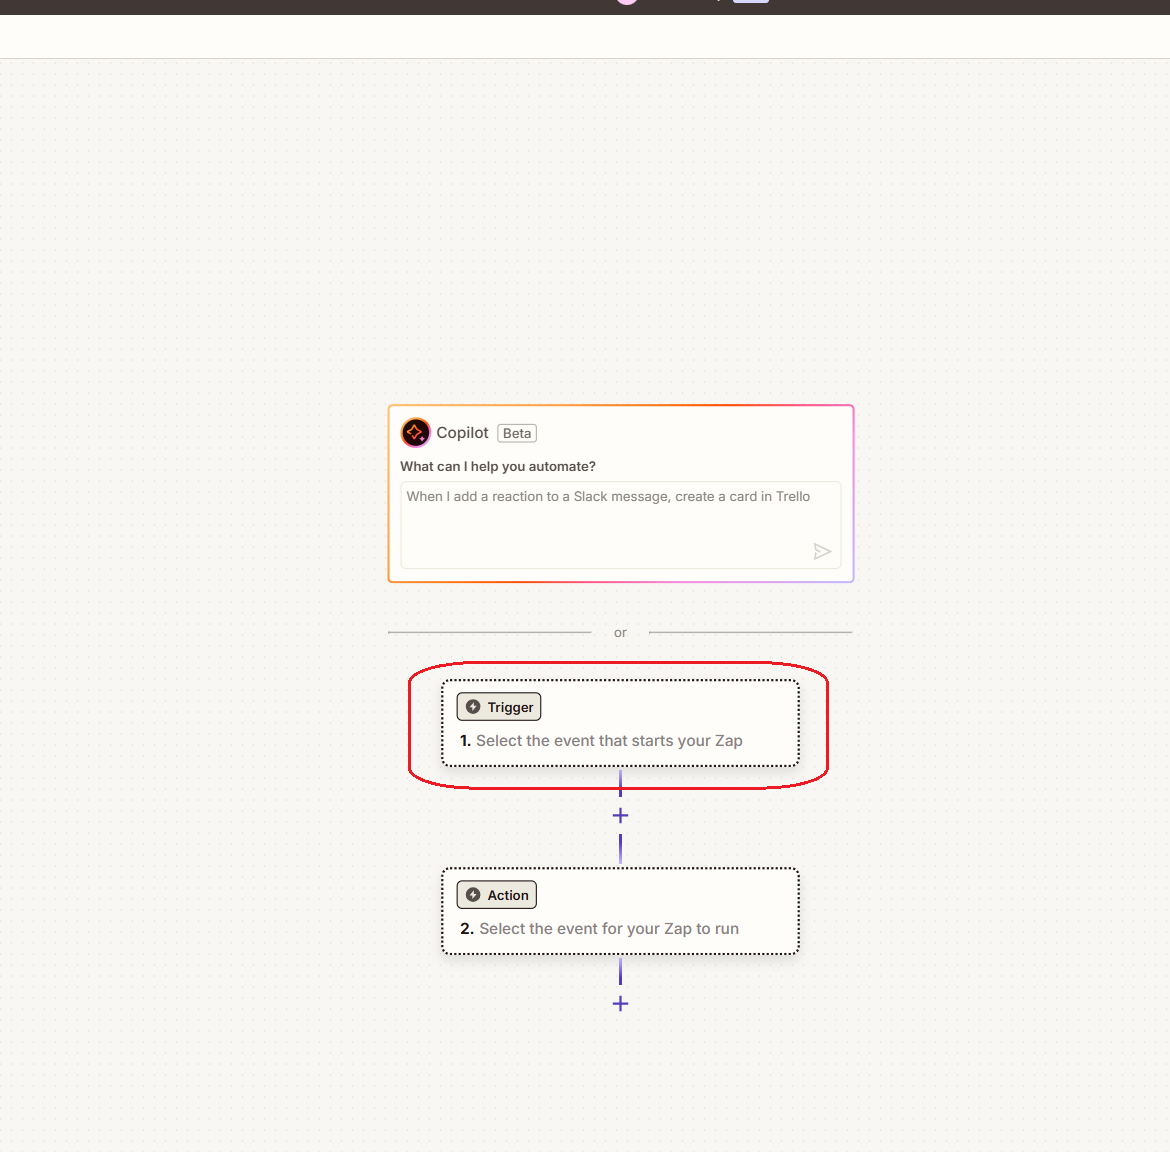
Let’s start creating our Zap! The first step is to click the Create button in the top left corner and select Zaps.
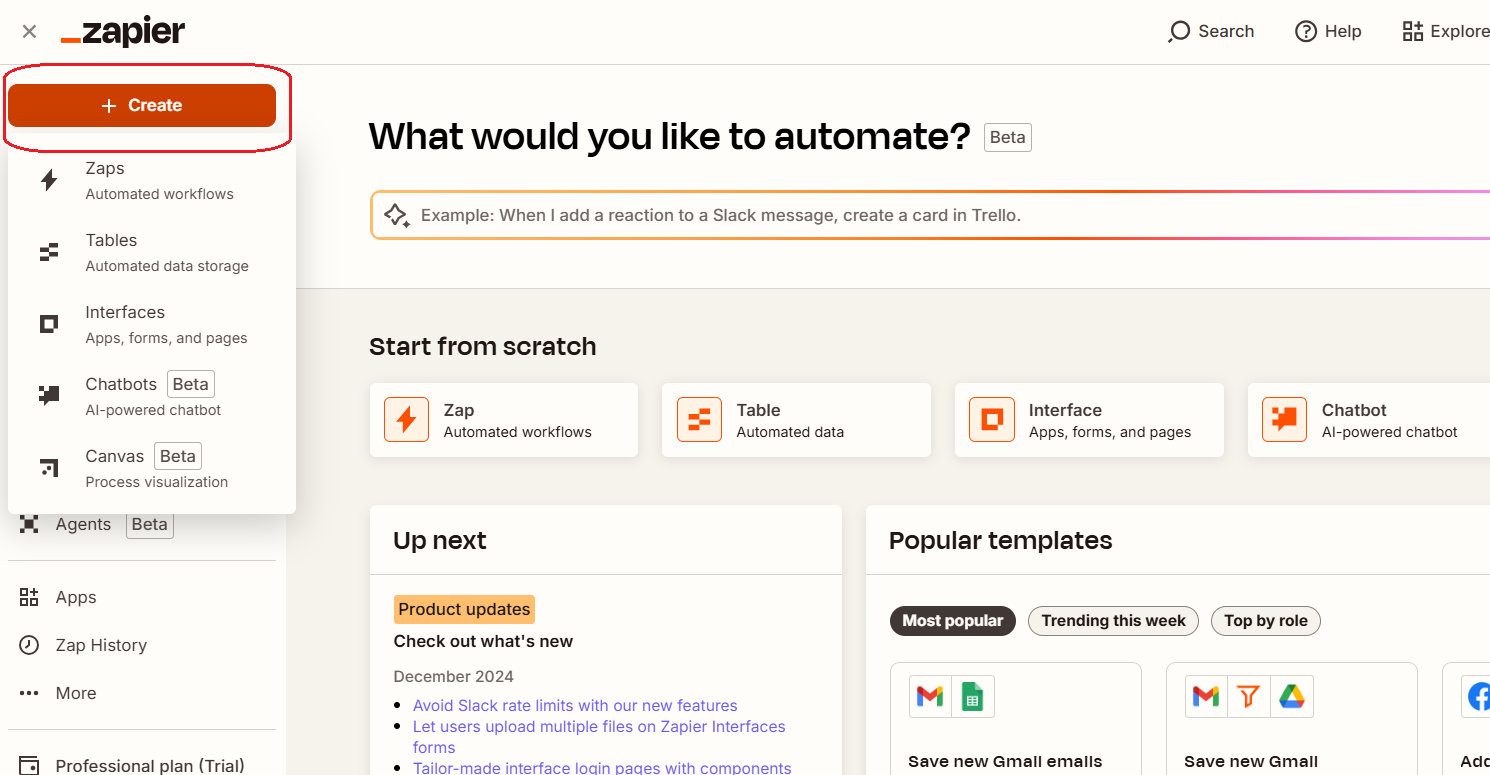
This leads to the editor page below where we can start creating our first Zap!

Step 2: Set up an account with Uptime.com
One of Zapier’s greatest superpowers is its ability to easily integrate with hundreds of tools, needing no technical know-how and saving you time and effort.
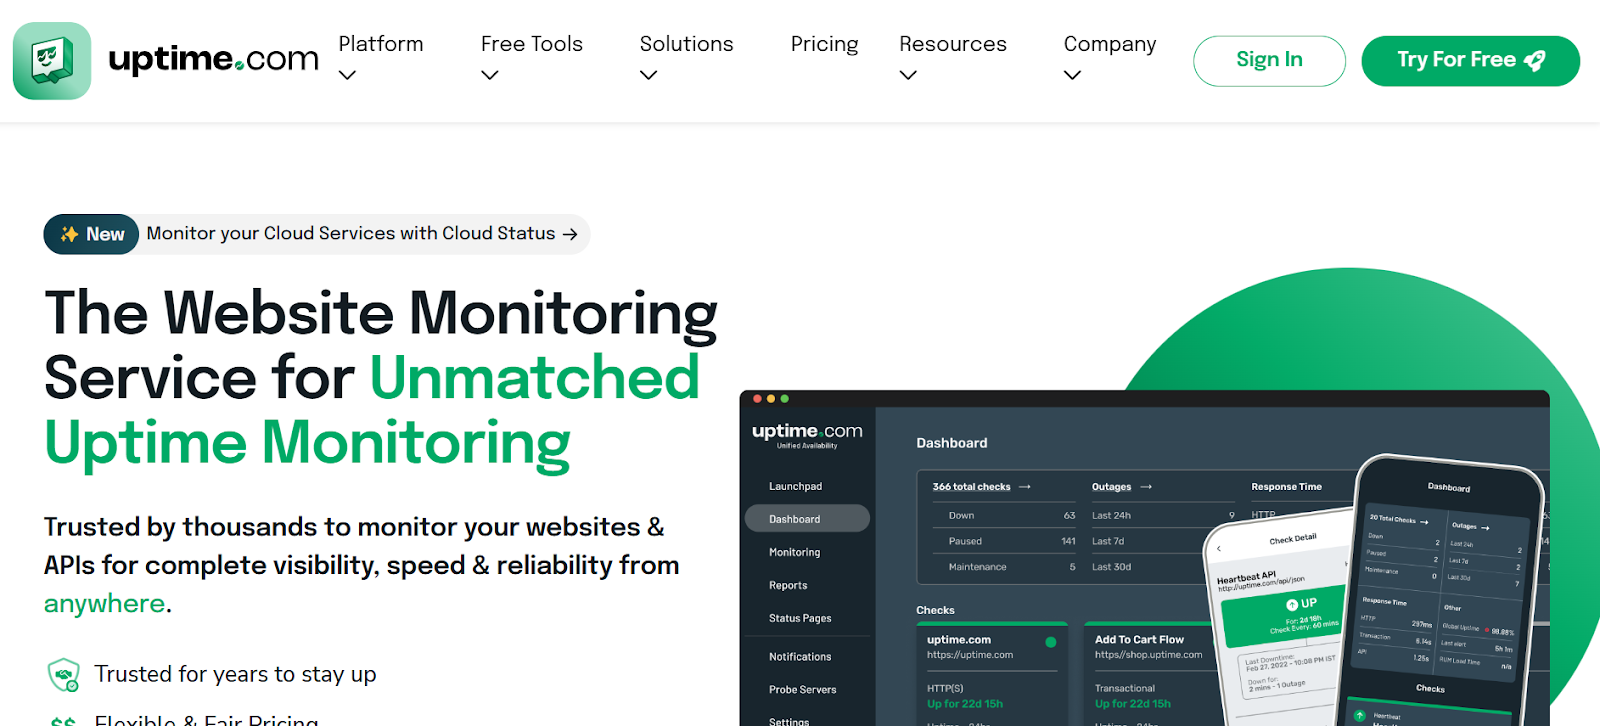
Now that your Zapier account is ready, let’s harness that power by integrating a website monitoring tool. For this guide, we’ll use Uptime.com, an exceptional free service that keeps an eye on your website's vitals.
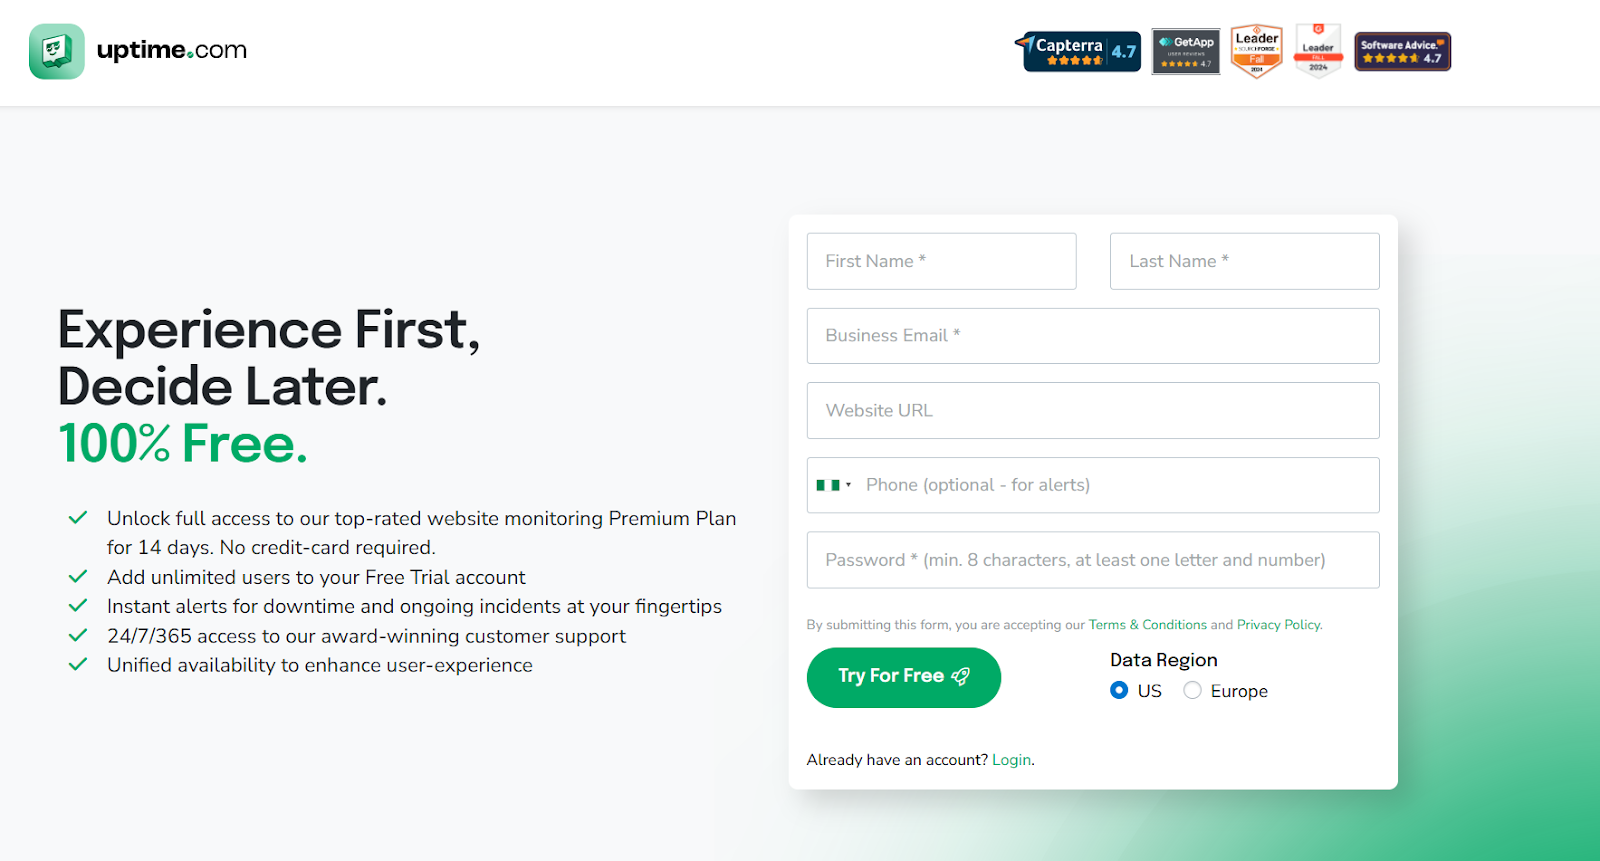
Let's get started! By clicking the “Try for free” button in the top right corner.
The next step is filling out the registration form (you can skip the website URL field here).
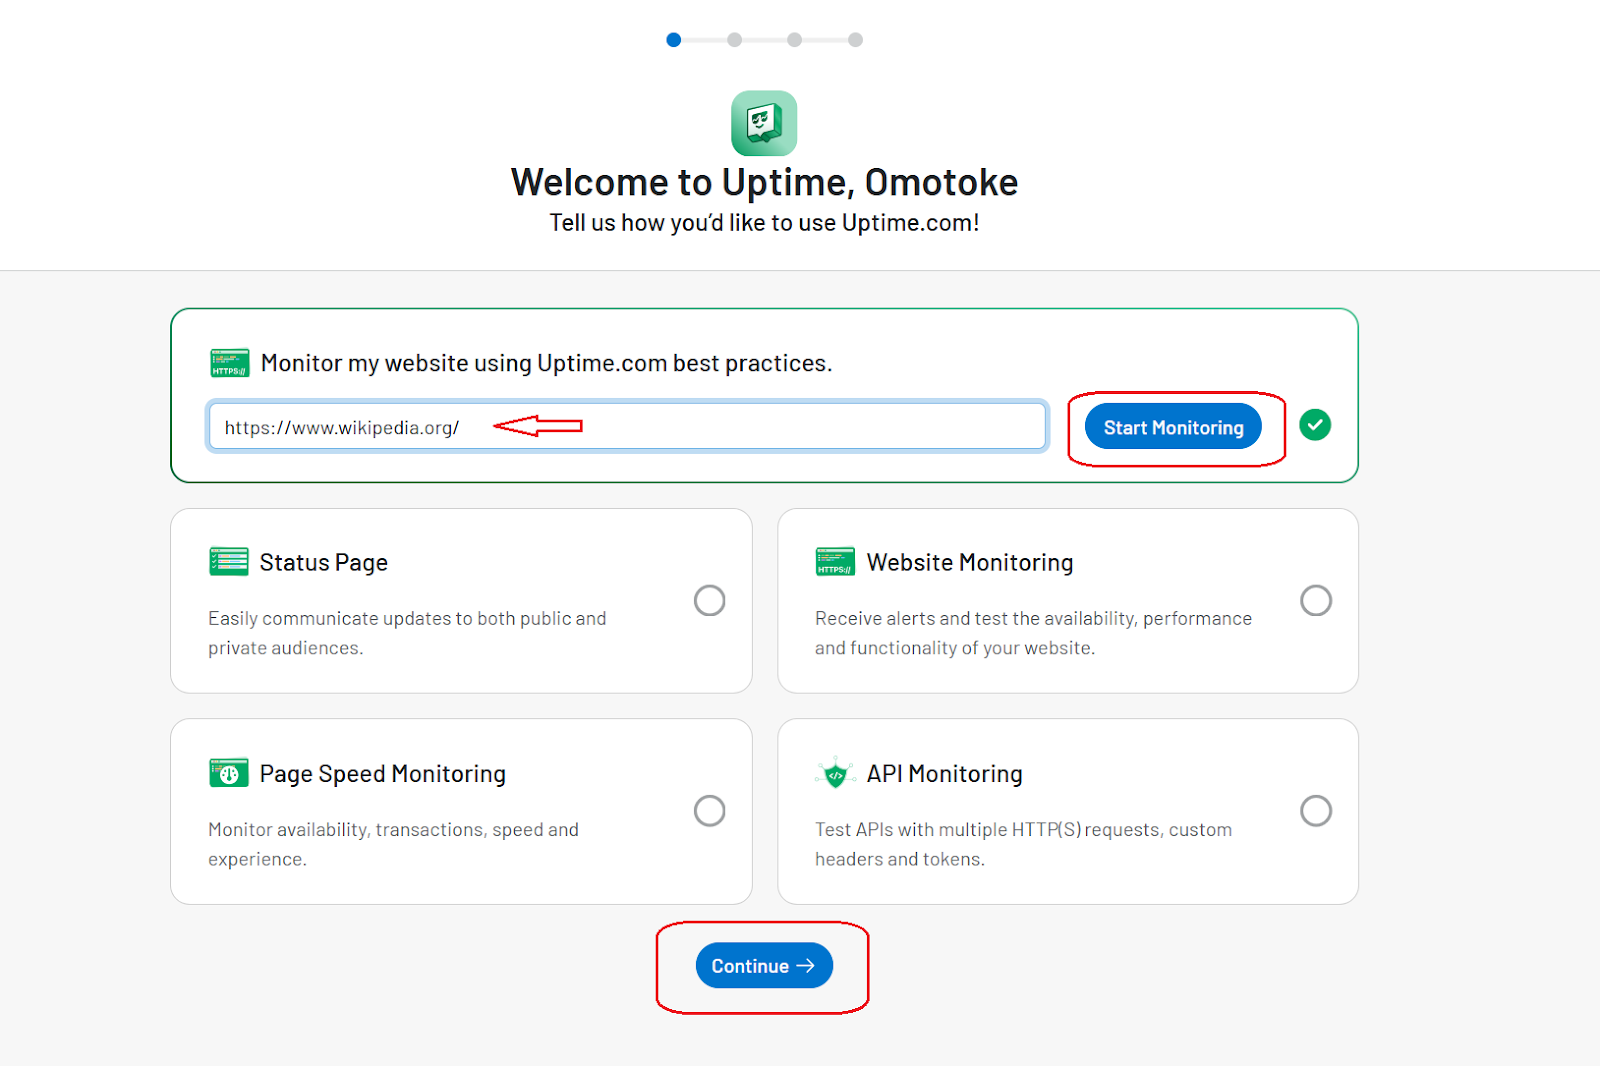
After signing up for Uptime.com, you’ll be guided to this setup page. Let’s walk through it step-by-step:
After completing the onboarding process, you’ll land on the Uptime.com dashboard.
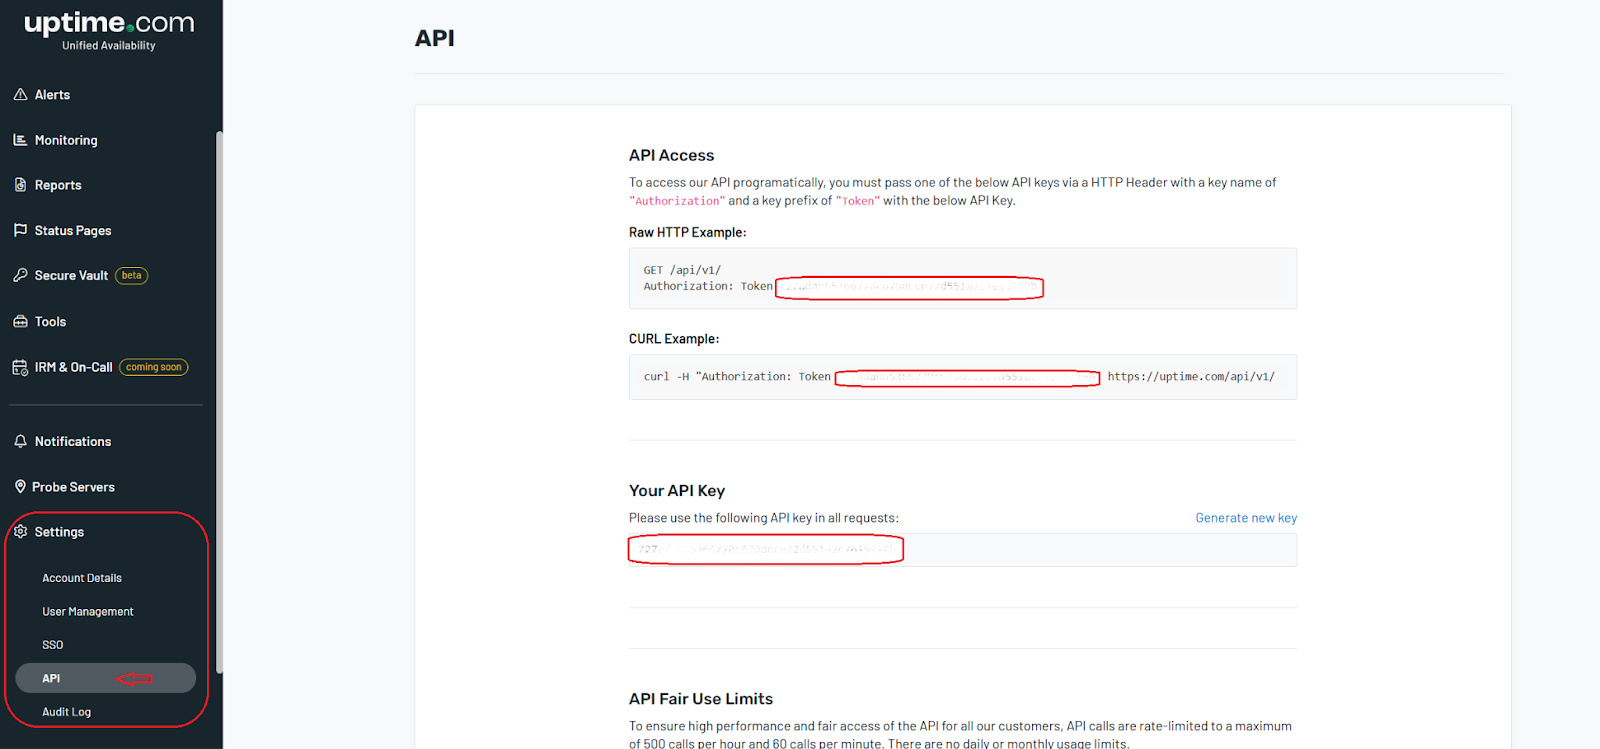
To integrate with Zapier or other tools, you’ll need to get hold of your API key. Follow these steps to find it:
- Navigate to Settings:
- Look for the Settings option in the left-hand menu and click it.
- Select the API Section:
- Under Settings, click on API to access your API details.
- Copy Your API Key:
- In the API Key section, you’ll see a unique key that grants access to your account for integrations. Click Copy to store it.
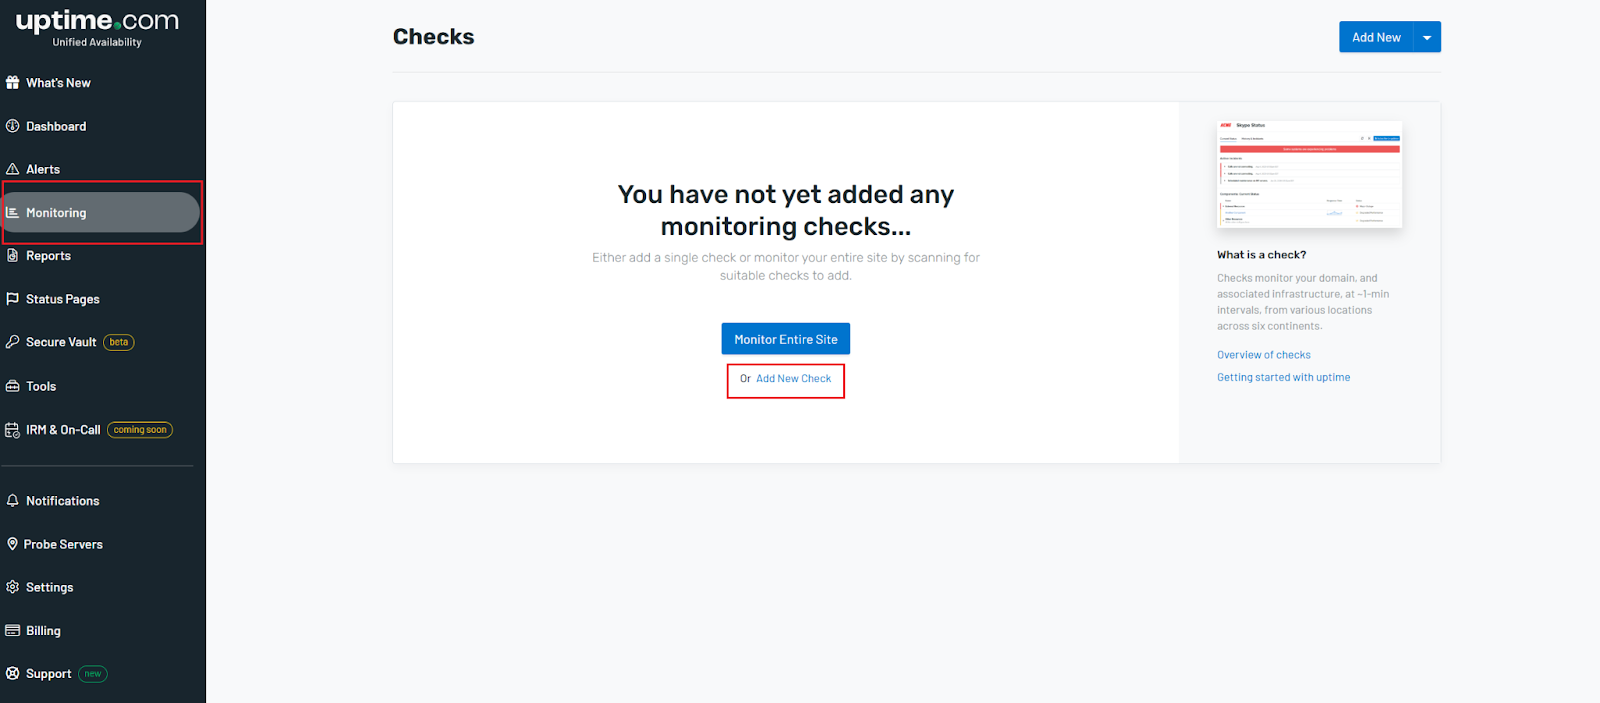
The next step is to add the website URL we want to monitor in Uptime.com by:
- Navigating to the Monitoring page
- Clicking Add New Check
The Add Check pop-up screen is where you configure what aspects of your website you want Uptime.com to monitor. Let’s break it down step-by-step (you can follow these steps in the video below):
- Set up the basic configuration:
- Name of check: Give your check a meaningful name (e.g; “Homepage Monitoring”) to easily identify it later.
- Check interval: Choose how frequently Uptime.com should run this check. A shorter interval (e.g; 2 minutes) ensures quicker detection of issues.
- Check type: Select what you want to monitor. For most website monitoring needs, choose Website HTTP(S) to ensure your site is online and returning the correct HTTP status codes.
- Choose the locations to monitor:
- Choose monitoring locations from around the world (e.g., New York, Los Angeles, London). This ensures Uptime.com checks your site’s availability from multiple geographical regions.
- Enter the URL to monitor:
- Enter the URL you want to test (e.g., https://tools.dev). Make sure this is accurate to avoid false alerts.
- Run a test:
- Before saving, click Run Test to verify the check works as expected. This ensures your configurations are correct.
- Save your check:
- Once satisfied with the configuration, click Save to activate the monitoring.

Step 3: Connect Zapier to Uptime.com
To connect Zapier and uptime.com, first click on Trigger on the Editor page inside of Zapier:
Next, search and select Uptime.com, this step will add the uptime.com integration to your Zap.
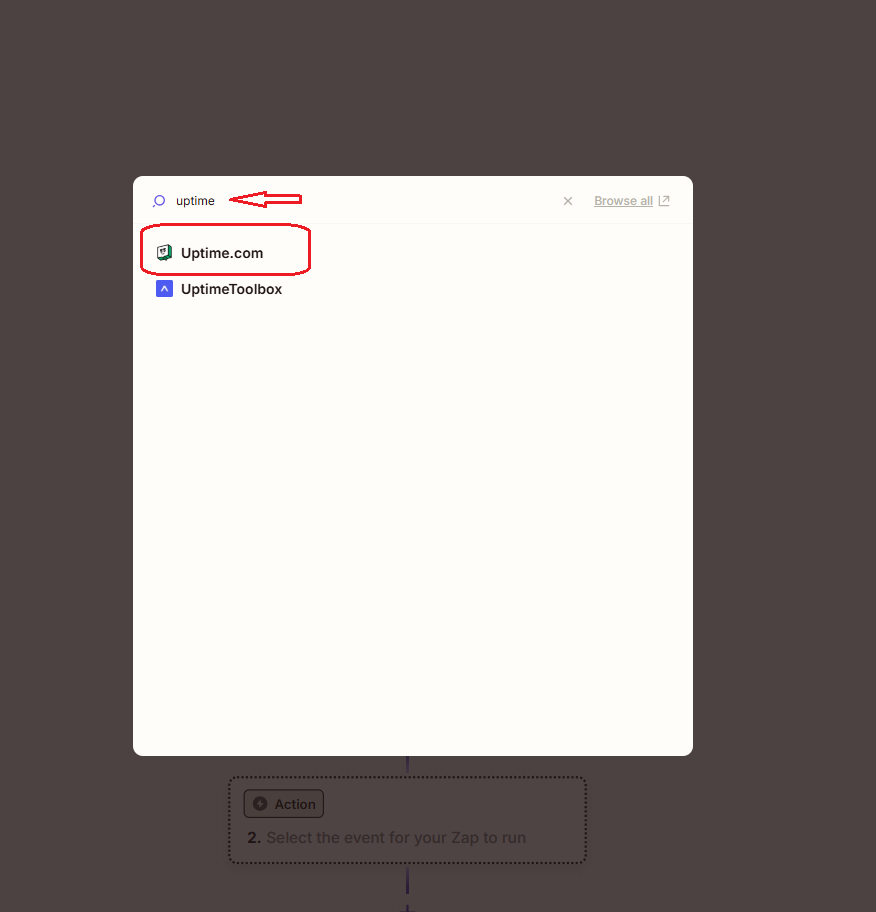
Choose “New Alert” as your trigger event.
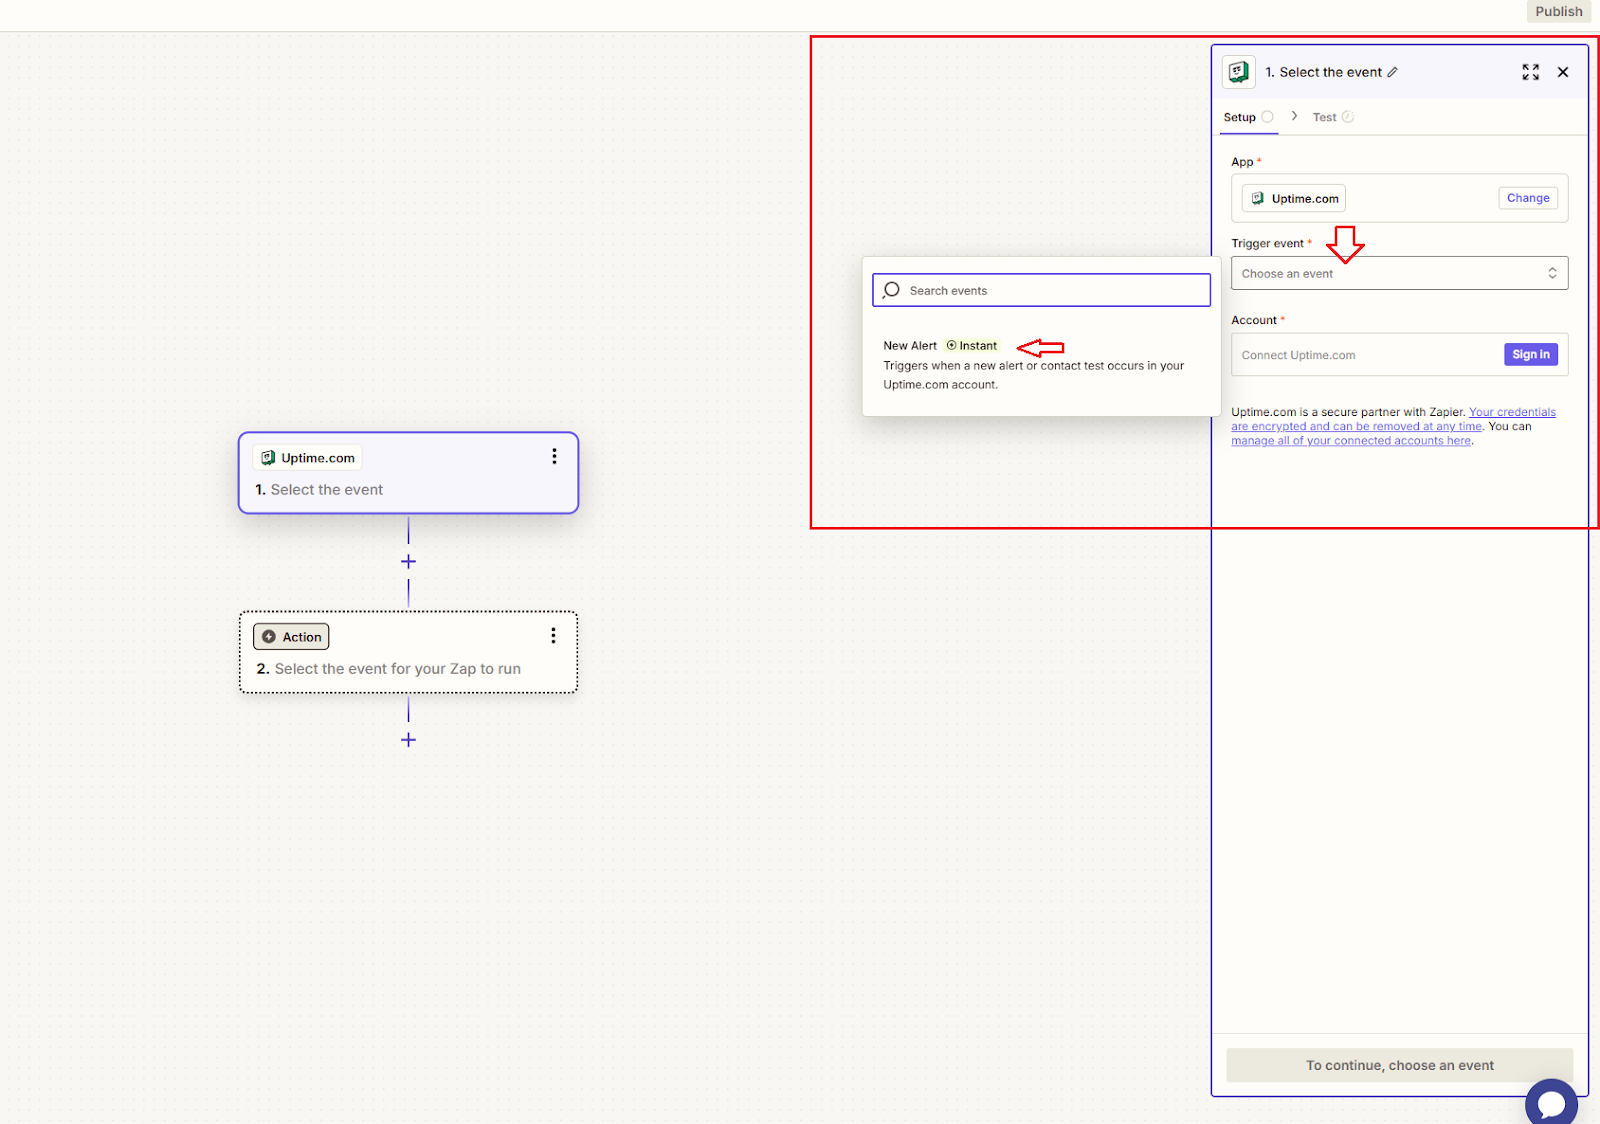
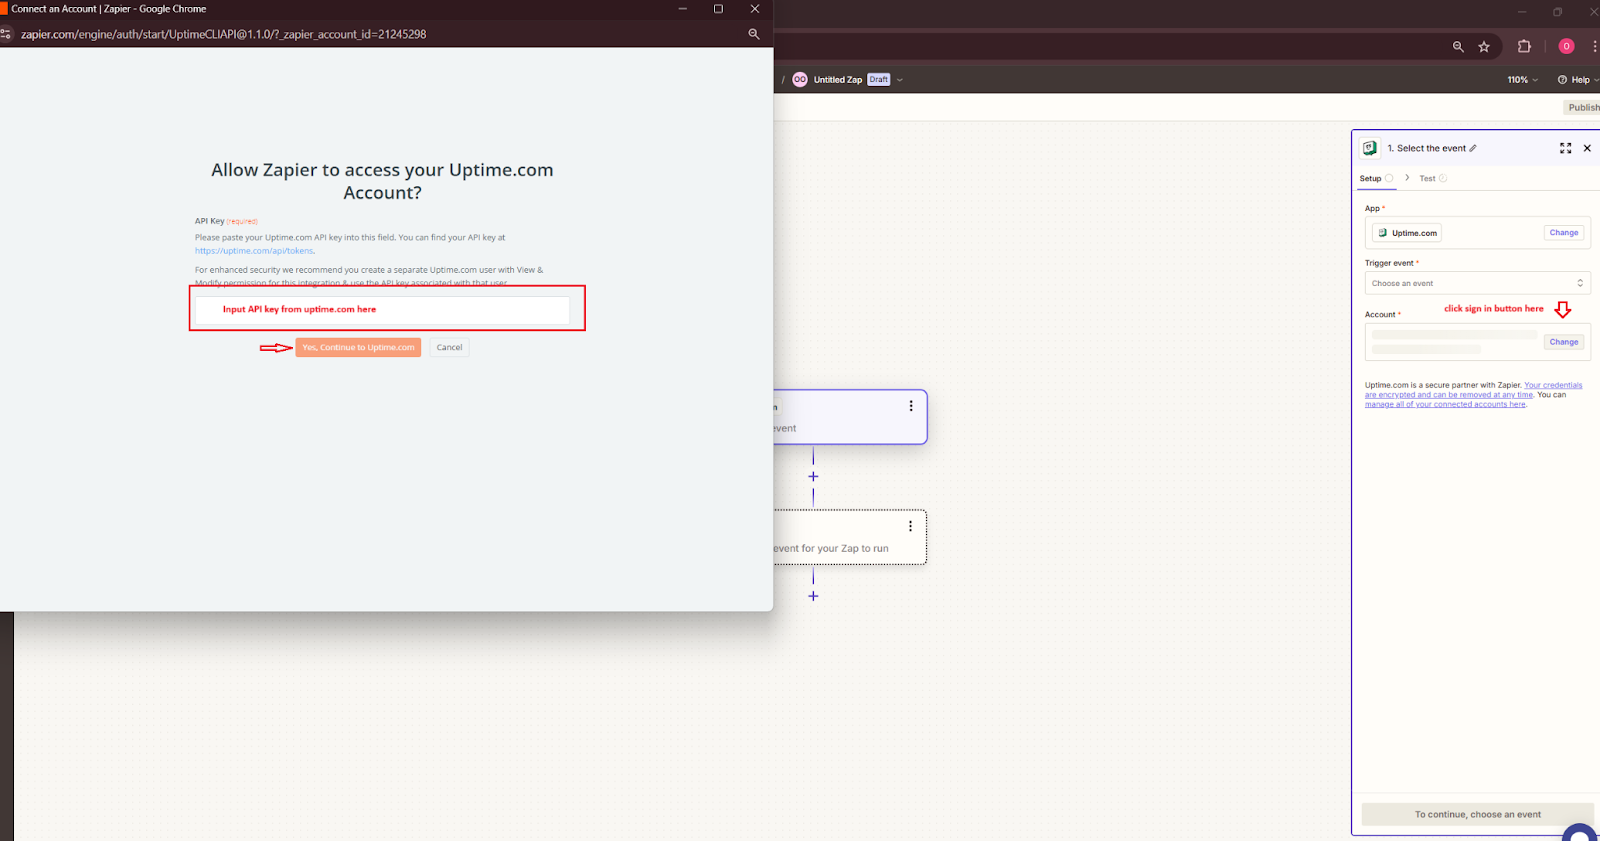
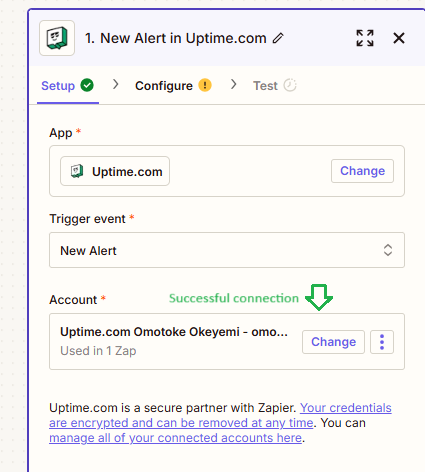
Connect your Zapier to your Uptime account by clicking the blue Sign in button, This will open up a modal for Authentication.
a. Input your API Key from Uptime
b. Click “Yes, Continue to Uptime.com” to connect fully to Uptime.com
If the connection is successful, you should see your account in the left sidebar like in the image below. Click Continue to move to the next step:
After successfully connecting to uptime.com, we need to test our trigger to check if we are receiving the right data from uptime.com.
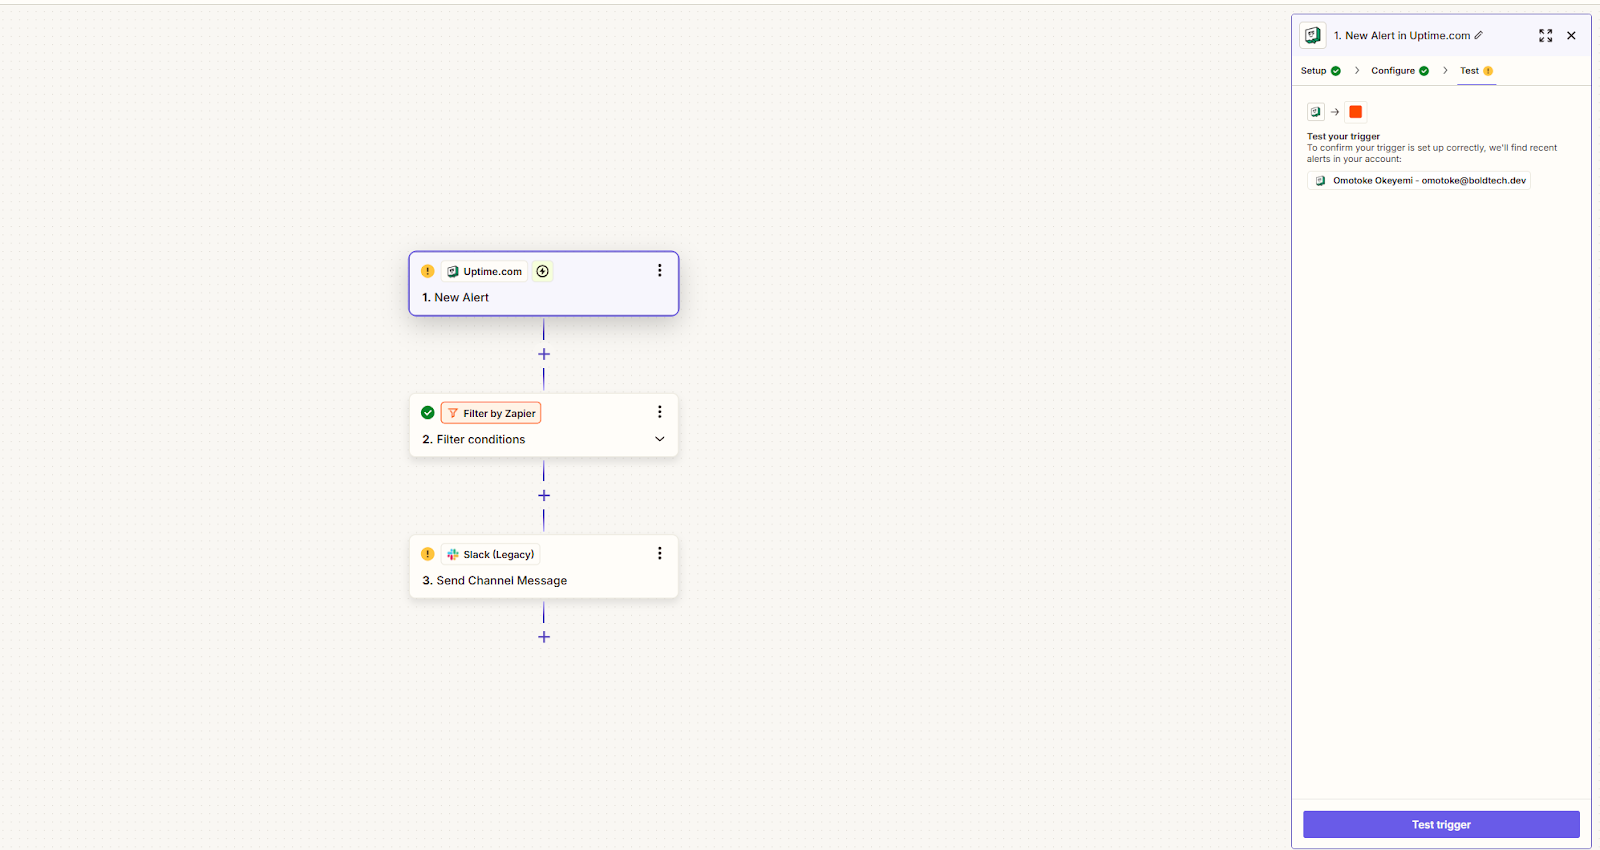
This should return data from our run tests in uptime.com.

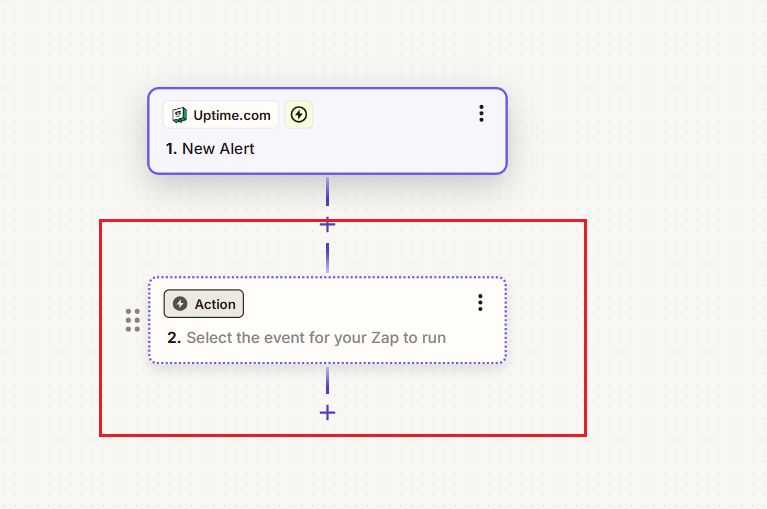
Now that we have successfully connected to Uptime.com, we need to add the next steps in our Zap!
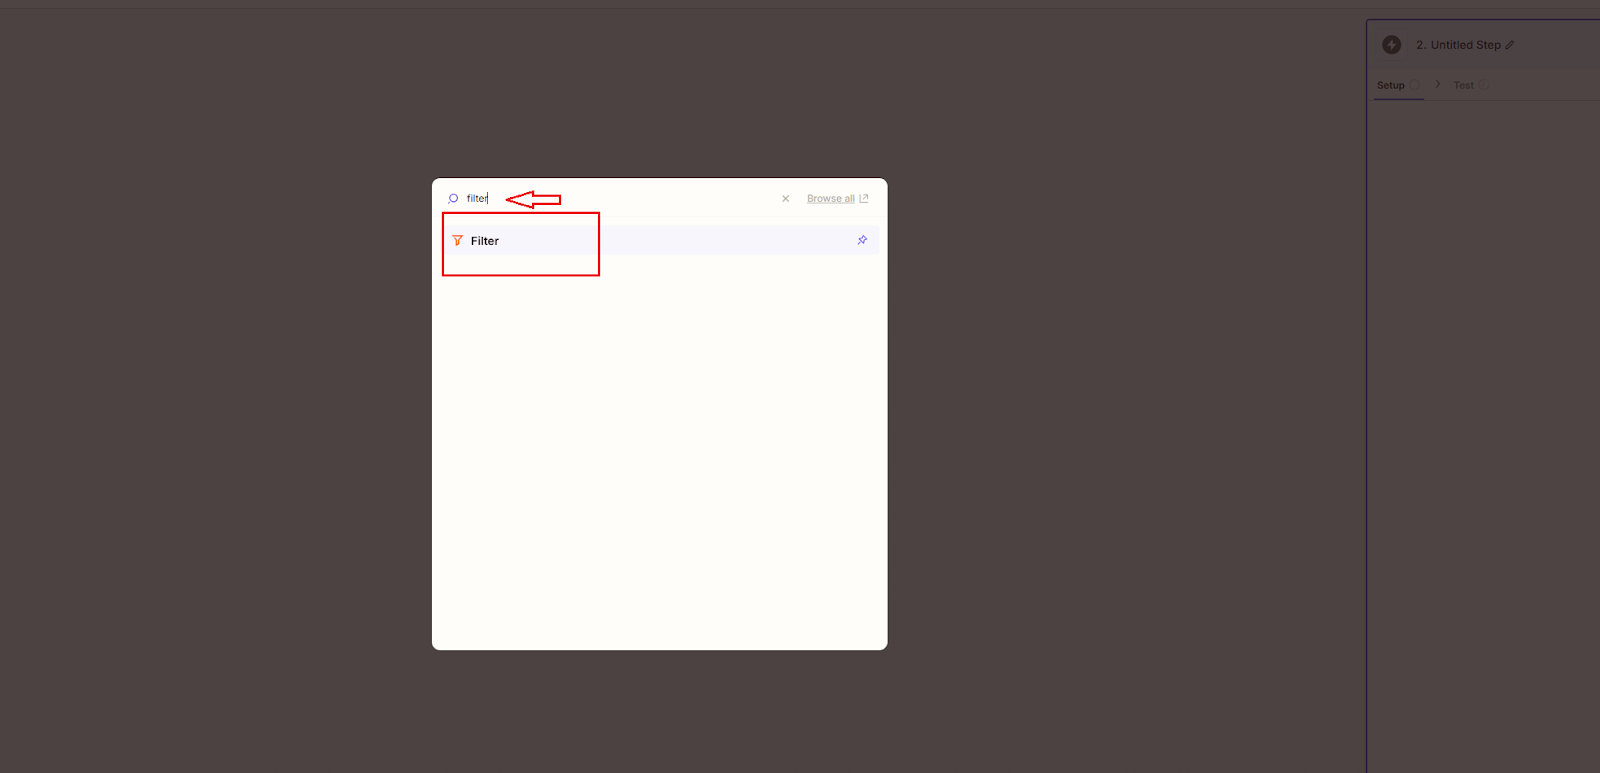
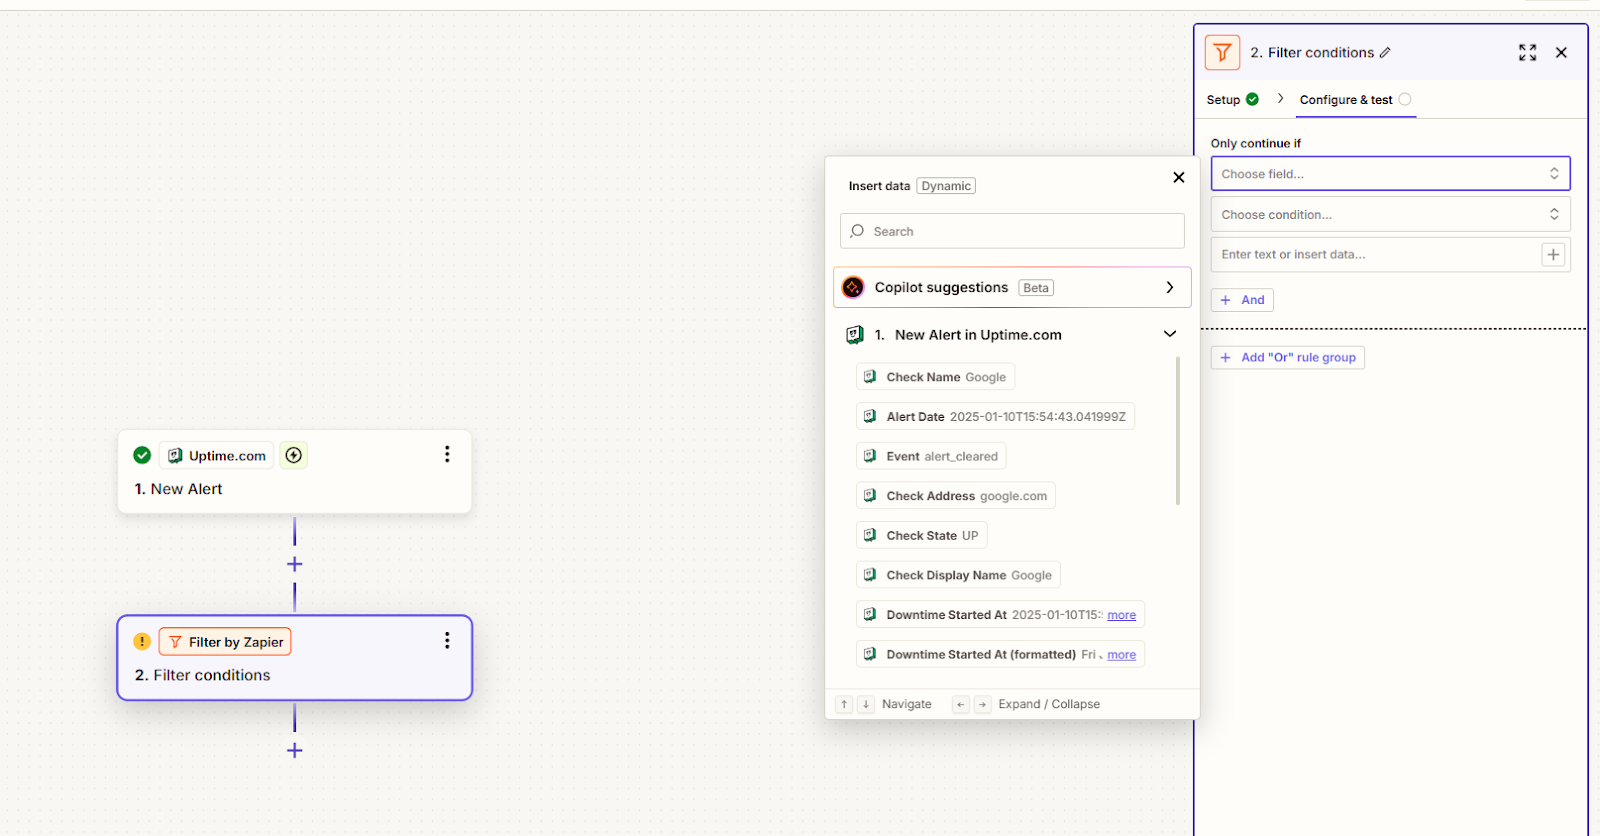
For our use case, we need to only send alerts when the website is down. To set this this up, we just need to configure a filter to make sure the trigger is not sent if the website is UP. Add an action and search for the filter.
The rule we need here is to filter out data where Check State is UP. This filter means that the Zap will only continue if the Check State value is anything other than 'UP', so will notify you if the Check State is equal to 'DOWN'.

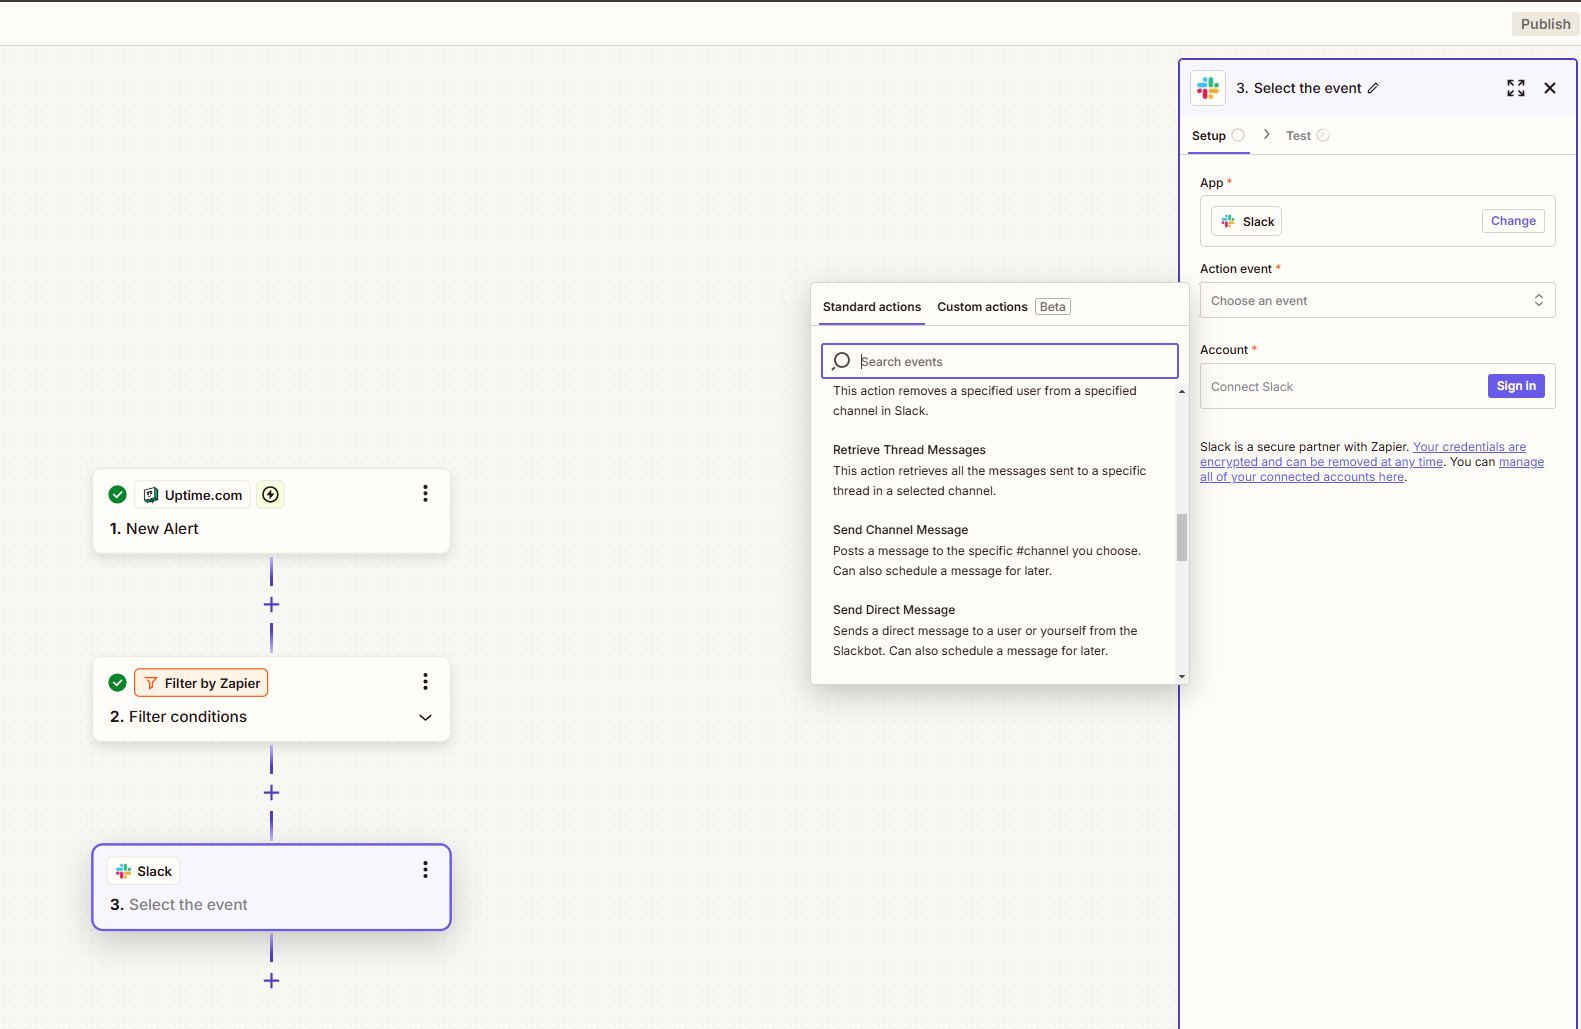
Step 4: Send Slack notifications
After setting up the filter, the final step is to configure the Zap to send a message to Slack and warn your team. This ensures that whenever the website goes down, a notification is automatically sent to the relevant Slack channel or Direct message, keeping your team informed promptly.

Add another step to this Zap and select Slack as the app. Connect your slack to your Zap by clicking on the “Sign in” button:
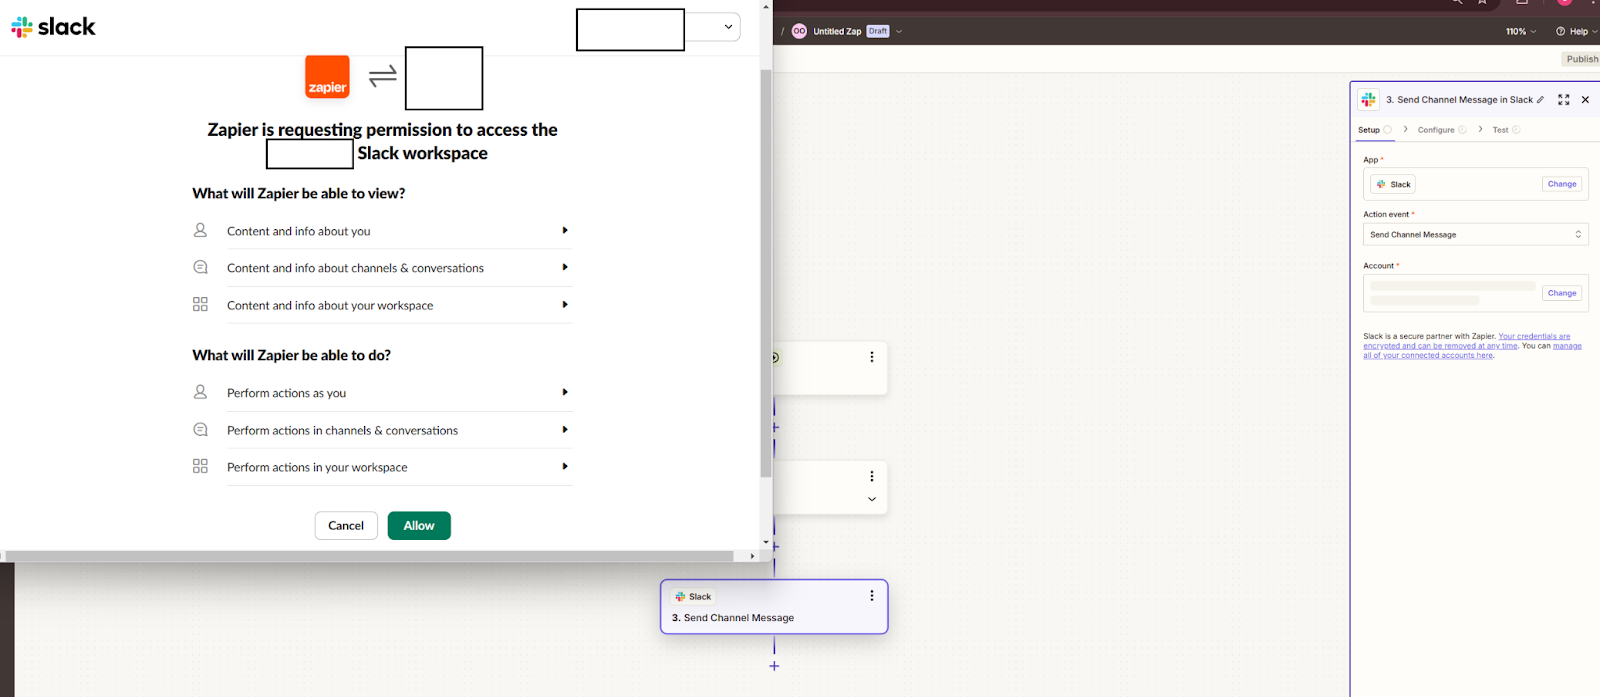
After clicking the “Sign in” button, this should open up an Authentication modal to easily integrate your slack with Zapier
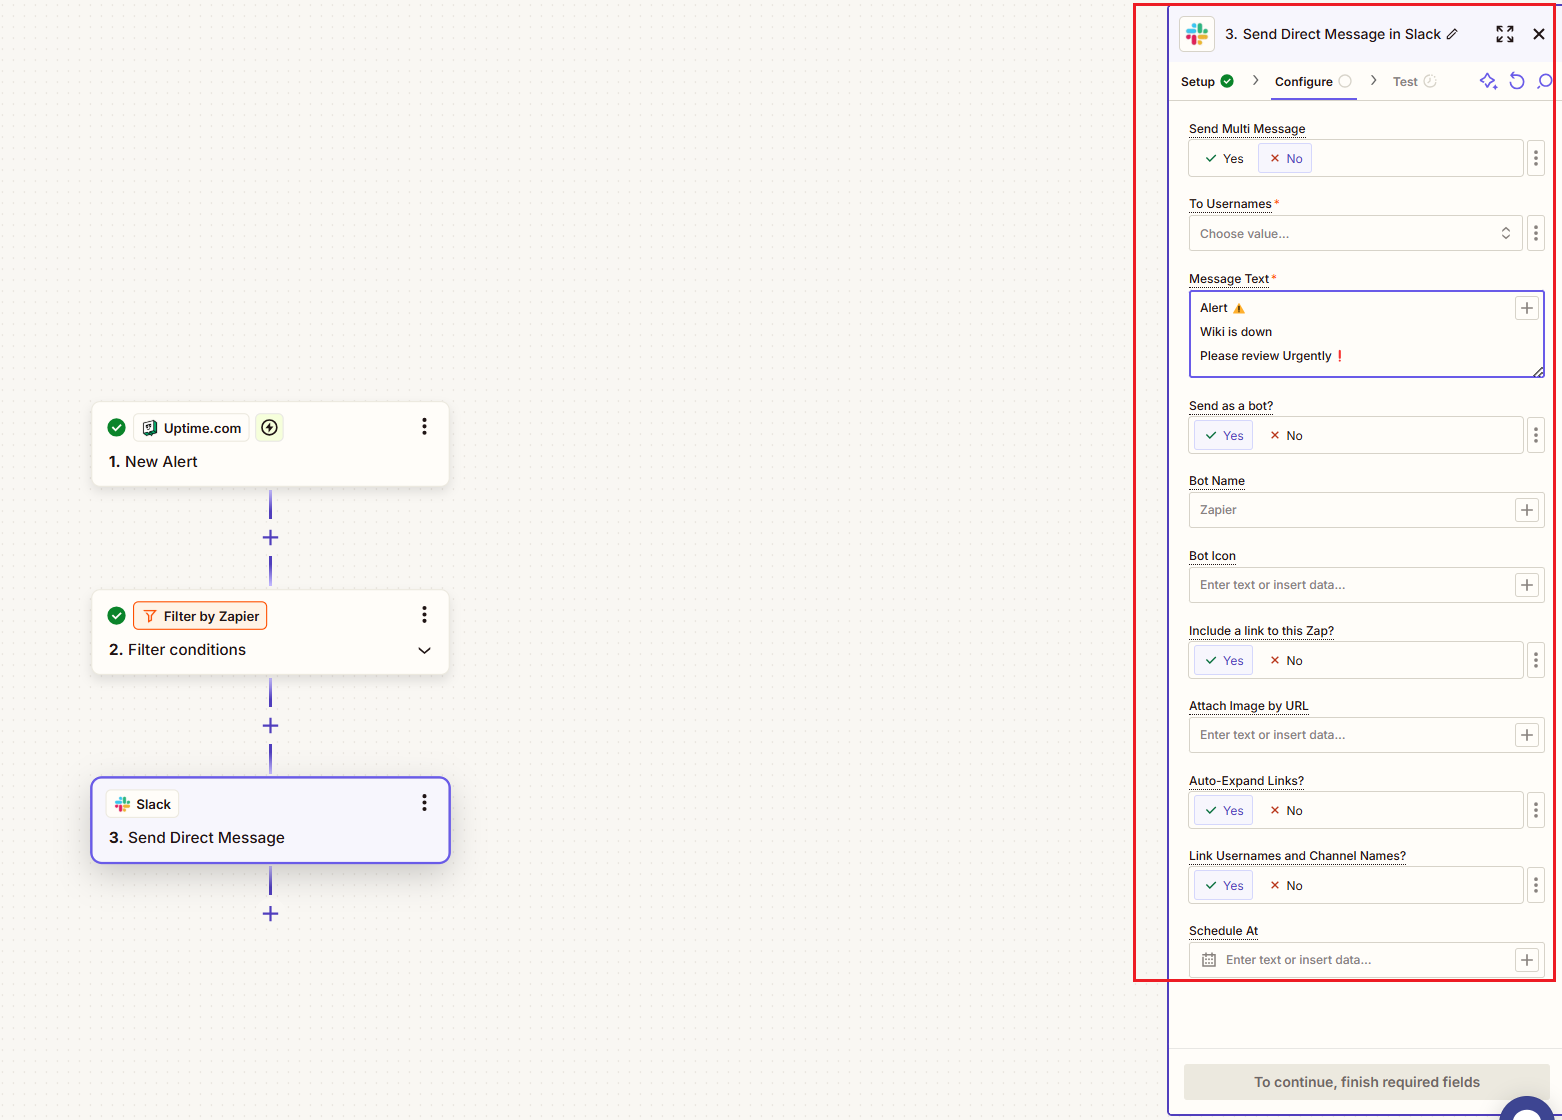
The next step in your Zap workflow involves configuring the Slack Action, which will send an alert to a specific user when the website is down. Here's an explanation of the important fields in this step:
- Choose Usernames/Channel:
- Specify the Slack username(s) or channel to send this message
- Message text:
- Enter the message content that will appear in Slack. In this case, it says:"Alert ⚠️ Wiki is down. Please review urgently ❗" You can customize this to include relevant details such as the name of the website or the timestamp of the alert.
- Send as a Bot?:
- Choose "Yes" if you want the message to appear as coming from a bot. If set to "No," it will use the authenticated user's profile.
- Bot name:
- If sending as a bot, you can specify a custom name for the bot (e.g., "Uptime Alerts").
- Bot icon:
- Optionally, you can attach a custom icon URL or emoji to represent the bot.
- Include a link to this Zap?:
- Set to "Yes" if you want to include a clickable link to the Zap for easy access and troubleshooting.
- Link usernames and channel names?:
- Set to "Yes" to allow Slack to recognize and link any @usernames or #channel names mentioned in the message.
- Schedule at:
- If you want the message to be sent at a specific time rather than immediately, provide a scheduled timestamp here.
- Test the action:
- Once all fields are configured, test the Slack message to ensure everything is working as expected.
Once completed, this step ensures that downtime alerts are promptly delivered to the specified user(s)/channels in Slack.
Alternatively, if you prefer to send an email notification via Gmail, you can configure the final step in your Zap to send a message directly to the recipient's email inbox. Here's how to set it up:
- Add Gmail as the Action App:
- Select Gmail from the list of available apps in Zapier.
- Choose the Action Event:
- Pick "Send Email" as the action event to create and send an email notification.
- Set the Recipient (To):
- Enter the email address of the recipient(s) who should receive the alert. You can specify a fixed email address/es
- Subject line:
- Craft a concise subject line that clearly identifies the issue, such as:"🚨 Alert: Website is Down!"
- Email body:
- Write the message content with all the relevant details. For example:"Hello,The website [Website Name] is currently down as of [Timestamp]. Please review this issue urgently to restore availability.Best regards, Your Monitoring Team"
- From name:
- Specify a sender name, such as "Website Monitoring Alerts," so the recipient knows who the email is from.
- Reply-To email:
- Provide an email address for replies, if needed.
- Attach files (Optional):
- If applicable, include any files or reports related to the alert by uploading or mapping them.
- Test the Action:
- Run a test to confirm that the email sends successfully and displays the intended content.
- Turn on the Zap:
- Once everything is configured and tested, activate the Zap to start sending email alerts automatically when a downtime event is detected.
With this setup, email notifications will keep your team informed, even if they don’t use Slack.
Explore our Workflows articles for more inspiration to set up more efficient workflows for your teams in low-code platforms like Zapier or Make.com, or even developer tools like Windmill.

